The following steps walk you through the process
necessary to back up a database in SQL Server 2008 through the SQL
Server Management Studio GUI tool. These steps are designed to give you
an idea of what you need to consider when backing up your own databases
and how you could
go about the process. As covered later in this section, this is not the
only way to back up your SharePoint databases through SQL Server, and
it may not be the best option for you to choose, but it is a starting
point from which you can better understand how SQL Server handles
database backups.
Note
The user executing the backup must, at a minimum, have been granted the db_backupoperator security role within the target database server to back up a database.
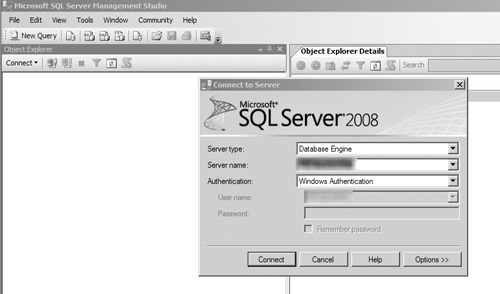
Open SQL Server Management Studio and connect to the SQL Server database instance hosting the database you want to back up. Figure 1 depicts the connection dialog box shown when opening SQL Server Management Studio.
Note
SQL Server Management Studio
is the graphical user interface (GUI) client management tool provided
with SQL Server 2008 to administrate database instances and databases
running on the platform. It is installed by default on all servers
hosting SQL Server 2008 and can be individually installed on client
computers to allow for connections to remote SQL Server hosts.
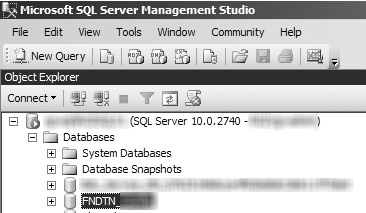
Once
SQL Server Management Studio connects to the target database instance
and opens, the contents of the instance are displayed in the tree view
of the Object Explorer pane (which, by default, opens on the left side
of the window). Expand the Databases entry in the Object Explorer, and
find the name of the database targeted for backup. See Figure 2 for an example.
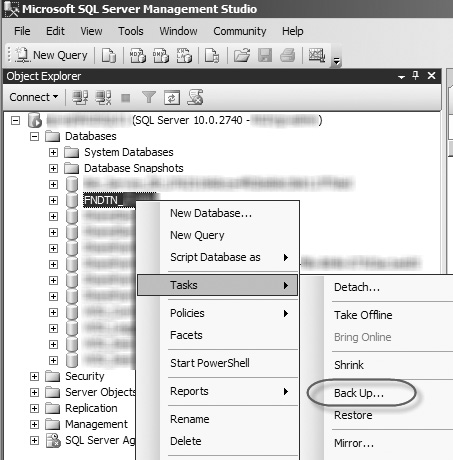
Right-click
on the name of the database, select the Tasks option when the menu
opens, and then click on the Back Up option (as shown in Figure 3) to open the Back Up Database dialog box.
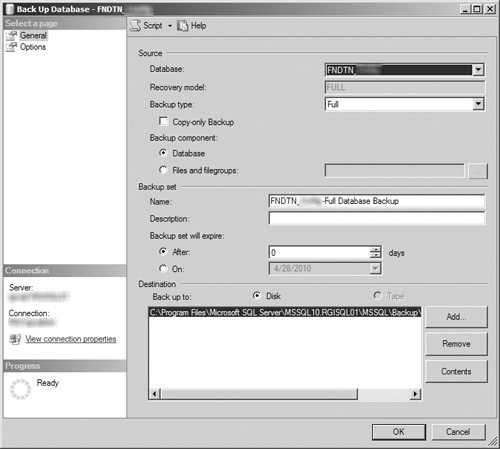
The
Back Up Database dialog box opens, allowing you to customize the backup
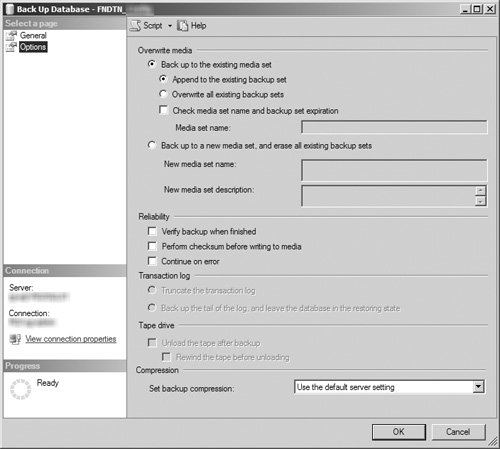
operation to meet your needs. On the General page (see Figure 4),
you can configure the source database for the backup and determine the
backup type, the components to be backed up, the backup set associated
with the backup, and the destination for the file(s) created by the
backup operation. The Options page (see Figure 5)
allows you to configure settings for overwriting existing backup files,
backup reliability testing, and handling of transaction logs and tape
drives by the backup operation. After you have configured the backup
settings according to your requirements, click the OK button to start
the backup operation.
Note
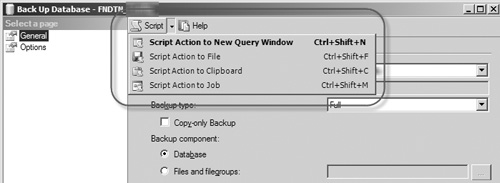
The Script drop-down menu (see Figure 6)
at the top of the Back Up Database dialog box allows you to create a
Transact-SQL (T-SQL) script that can be executed to back up your
database without the GUI interface described in these steps. The script
created by this process uses the same configuration settings that you
selected in the dialog box. This allows you to configure your database
backup using a user-friendly tool and convert those settings into a
format that an experienced database administrator can use to automate
the backup process.
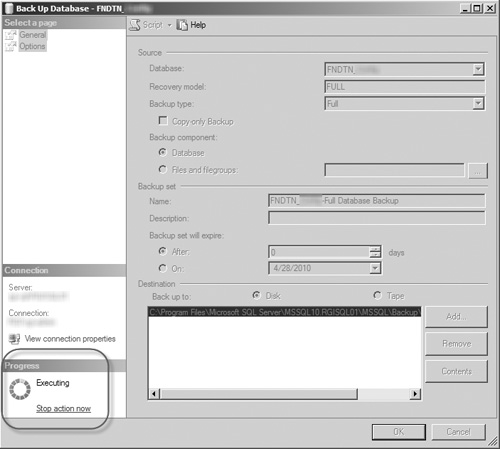
As the backup runs, the Progress box in the lower-left corner of the dialog box (see Figure 7) displays a percentage indicating how much of the backup operation has been completed. There is also a link displayed below the Progress indicator allowing you to cancel the operation.
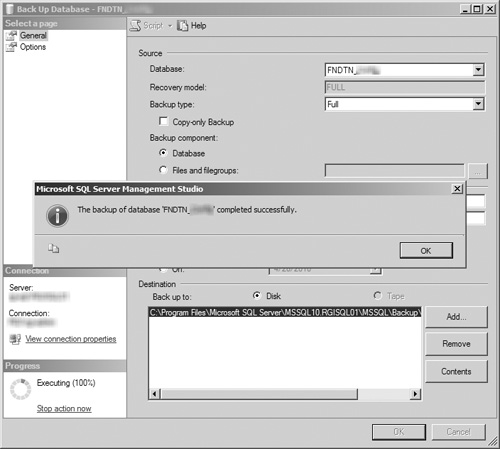
After the backup is finished, a message box stating The backup of database <your database’s name> completed successfully is displayed (see Figure 8). Click the OK button to return to the SQL Server Management Studio main window.
Before moving on to how to
restore the target database from the backup file you just created, take a
moment to review the configuration options available for your SQL
Server backups. As noted in step 4, you have quite a few options
available for configuring your database backup to meet your specific
needs. If possible, it’s a good idea to discuss these options with your
database administrator before implementing them to confirm the correct
course of action to take for your system.