2. Configure Replication Groups
Replication groups
define the relationships that DFS will use to replicate data between
partners in a DFS replication topology. You will choose the partnerships
and the types of replication that occur between those partners.
Open the DFS Management tool, select Replication.
In the Actions pane, select New Replication Group.
Select the type of replication group.
Type a name and a description, and select the domain for the replication group.
Click Add to select two or more servers to become members of the replication group.
Select a topology for replication.
Select
a replication schedule. This is one of the coolest things about DFSR.
You can pick the amount of bandwidth that will be used by DFSR and the
schedule for when the replication will occur.
Use the drop-down menu to select a primary member.
When
you first set up replication, you must choose a primary member. Choose
the member that has the most up-to-date files that you want replicated
to all other members of the replication group, because the primary
member's content is considered "authoritative." This means that during
initial replication, the primary member's files will always win the
conflict resolution that occurs when the receiving members have files
that are older or newer than the same files on the primary server. After
the initialization of the replicated folder, the "primary member"
designation is removed. The member that was previously the primary
member is then treated like any other member, and its files are no
longer considered authoritative over those of other members who have
completed initial replication.
Select the path to the folders that you want to replicate.
Define the local path on the other servers for the folder you want to replicate on the other members of the replication group.
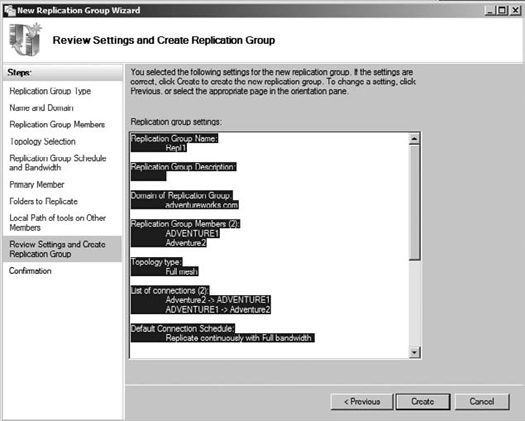
Review the summary settings for the replication group, as shown in Figure 4.
Review the results of the wizard, and click Close.
Please keep in mind at this
point that the replication will not start immediately. Based on the
settings and schedule that you provided during setup, the initial
replication will proceed when DFSR is ready and only after the new
configuration settings have been picked up by all the members of the
replication group. This can take some time depending on how your Active
Directory replication is occurring.
3. Enable Previous Versions of Files
So, let's say you have been
working for the past few hours modifying a file. Your boss calls and
says he would like a copy of the same file you are working on only
without all the current changes. If you were really lucky, you used Save
As and started your editing with a new file. (We know that's not very
likely.) But if you had enabled previous versions, you could simply
smile and say, "Sure, Boss! The file is on its way."
You can use the previous
versions feature to allow your users to access previous versions of
their files and folders that they have stored on the network. The
service that is working behind the scenes to make this all possible is
called the Volume Shadow Copy Service. To use previous version of files
and folders, you will need to enable shadow copies of shared folders on
the file server.
Navigate to Administrative Tools, and then click Computer Management.
In the console tree, right-click Shared Folders.
Go to All Tasks, and click Configure Shadow Copies.
Select the drive on which you want to enable shadow copies.
Click Enable.
You
are going to get a notice warning you of the potential problems of
enabling shadow copies on servers that have high I/O loads. Heed the
warning, as shown in Figure 5.
Click Yes to enable shadow copies.

Now your enabled shares will maintain previous versions of files.
4. Restore a Previous Version
Restoring previous versions of files and folders is a pretty straightforward process:
Locate the file or folder you want to restore.
Right-click, and choose Properties.
Click the Previous Versions tab.
Select the version of the file that you want to restore.
A warning message will appear about restoring a previous version of a file or folder.
It is really important to
understand this point! Restoring a previous version will delete the
current version. When you restore the shadow copy, you will replace the
current version with the file or folder at a previous point in time, and
your changes since that point in time will be lost. To avoid losing
your changes, you can choose to copy the previous version to a different
location, thus preserving your changes and allowing you to use the
previous version as well.
These are a few other things to consider when working with previous versions:
If the Previous
Versions tab does not appear in the Properties dialog box, then shadow
copies might not be enabled on that server. Remember that shadow copies
are enabled on a server-by-server basis.
If
there are no previous versions listed on the Previous Versions tab,
then that file has not changed since the oldest copy was created. The
Previous Versions tab shows only unique versions of the file.
When
you restore a file to its existing folder, the file permissions will
not change. When you copy a previous version to a new folder location,
the files will inherit the permissions of the target folder.
If
you choose to restore a large folder, it will put a heavy workload on
the file server and can result in previous versions being deleted. Best
practice is to restore individual files instead of folders or
directories.
Previous files should not be used as a substitute for a good backup solution!
The previous versions feature is
an excellent resource for your network. It enables users to manage basic
recovery operations of shared files and folders.
