4. Inherited Permissions
By default, all files and folders contained in a folder
inherit the permissions assigned during installation or assigned by you
when you modify folder permissions. For a disk or other storage device,
the top-level folder for inherited permissions is the root folder. For
example, the top-level folder for the C: drive is the C:\ folder. Any permissions assigned to this
folder are inherited by all other folders on the C: drive automatically. The same is true when
you assign permissions to folders at any other level of the folder
hierarchy. For example, if you change the permissions for the C:\Data folder, all files and folders
contained in the C:\Data folder
inherit these permissions by default.
When you are working with permissions, you can easily determine
whether a permission is inherited. Inherited permissions are shaded
(unavailable) and directly assigned permissions are not shaded. If you
don’t want a file or a folder to have the same permissions as a parent
folder, you have several choices. You can:
Access the parent folder and configure the permissions you
want all included files and folders to have.
Try to override an inherited permission by selecting the
opposite permission. In most cases, Deny overrides Allow.
Stop inheriting permissions from the parent folder and then
copy or remove existing permissions as appropriate.
If you want a file or a folder to stop inheriting permissions from
a parent folder, follow these steps:
In Windows Explorer, right-click the file or folder you want
to work with and then select Properties.
In the Properties dialog box, select the Security tab and then
click Advanced. This opens the “Advanced Security Settings for”
dialog box.
On the Permissions tab, click Change Permissions. This opens
an editable view of the Permissions tab in a new dialog box.
Clear the “Include inheritable permissions from this object’s
parent” checkbox.
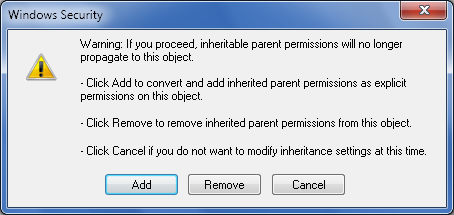
In the Windows Security dialog box, shown in Figure 6, click Add to convert
and add the permissions that were applied previously through
inheritance, or click Remove to remove the inherited permissions and
apply only the permissions that you explicitly set on the folder or
file.
After you modify or remove additional permissions as
necessary, click OK to save your settings.

5. Effective Permissions
Because anyone with a user account can belong to multiple
groups and those groups can all have different permissions with regard
to a file or folder, it is sometimes difficult to figure out exactly
what permission you or someone else has with regard to a file or folder.
To remove the guesswork involved, Windows 7 lets you view the exact set
of effective permissions for a particular user or group by completing
just a few steps.
If you want to view effective permissions, follow these
steps:
In Windows Explorer, right-click the file or folder you want
to work with and then select Properties.
In the Properties dialog box, select the Security tab and then
click Advanced. This opens the “Advanced Security Settings for”
dialog box.
On the Effective Permissions tab, click Select to display the
Select User or Group dialog box.
Type the name of a user or a group account. Click Check Names
and then do one of the following:
If a single match is found for each entry, the dialog box
is automatically updated as appropriate and the entry is
underlined.
If multiple matches are found, you’ll see an additional
dialog box that allows you to select the name you want to use,
and then click OK.
If no matches are found, you’ve probably entered an
incorrect name. Modify the name in the Name Not Found dialog box
and then click Check Names again.
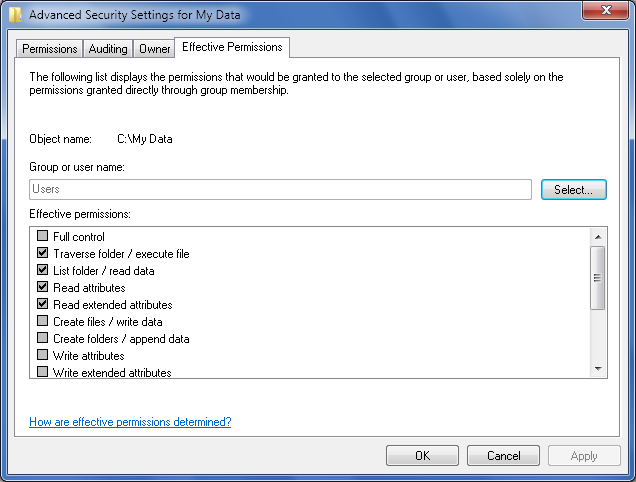
The complete set of effective permissions for the selected user or
group is listed as shown in Figure 7.
