Using Windows Sync Center
Keeping data
synchronized between multiple devices can be a particularly difficult
and frustrating task. When done manually, users must keep track of which
files are modified on which device. They must then remember to move,
copy, or delete the appropriate files from all of the devices that they
use. Forgetting to do this can result in out-of-date information or loss
of data. Even when this process is managed carefully, users often have
to remember different path locations for their files on different computers. Clearly, this is a task that could benefit from automation.
Windows Sync Center is
designed to enable multiple computers and mobile devices to keep
important information synchronized. It supports any computer that is
running Windows Vista, as well as mobile devices that are running the
Windows Mobile platform.
More Info: Using Windows Briefcase as an alternative
An alternative
method of keeping files synchronized between computers has been
available on the Windows platform for years: Windows Briefcase.
Briefcase is still functional in Windows Vista, but it lacks many of the
capabilities of Windows Sync Center. For more information about
creating and managing Briefcase, see the Windows Vista help file.
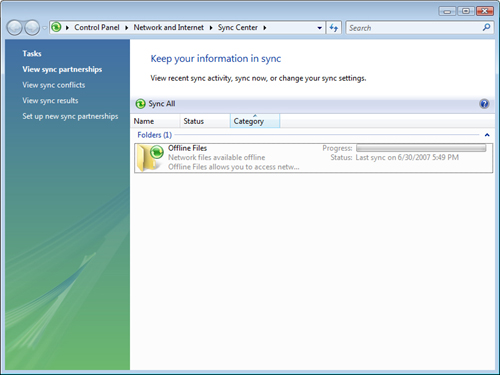
Accessing Windows Sync Center
Windows Sync Center
can be launched in several different ways. Earlier in this lesson, you
saw how users can monitor and access this feature using Windows Mobility
Center. The program can also be launched by searching for it in Control
Panel or in the Mobile PC section of Windows Sync Center. Figure 5 shows the main screen of this utility. The available tasks are listed on the left side of the interface.
Understanding Sync Partnerships
Windows
Sync Center is configured and managed through sync partnerships, which
are relationships between two devices that automatically enable
consistency of data. To define a new partnership, click the Set Up New
Sync Partnerships link (see Figure 6).
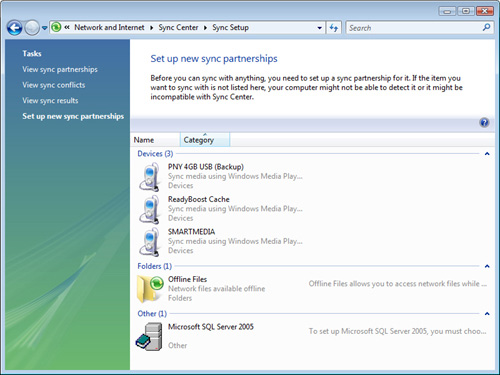
The different sections
of the user interface show the devices that are currently connected to
the computer. For example, if a device running the Windows Mobile
operating system is connected and configured, it appears in the list. In
addition, certain applications (such as Microsoft SQL Server 2005)
provide their own components for working with Windows Sync Center. For
more information about application-specific features, see the program’s
documentation.
There are two
main types of sync partnerships. One-way sync partnerships enable
copying files from a network location to a mobile device. They do not
provide a method by which changes are sent back to the original source
location. Two-way sync partnerships allow either computer to make
changes to file contents and can make the corresponding changes
automatically when the computers are connected.
Setting Up Offline Files
The most commonly
used feature on a mobile computer is the ability to make network-based
files available even when the computer is disconnected. For example, a
small-business owner might store his or her work-related documents in a
shared network folder. When the owner is disconnected from the network,
he or she would still like to access and modify those
documents. Additionally, users might not want to depend on the network
to access their important documents. For example, if a network
connection becomes unavailable, they would still like to be able to
work. Finally, constantly accessing files across a slow connection can
be a time-consuming process. Accessing a local copy is much more
efficient in those cases. The Offline Files feature provides a solution
to all of these problems.
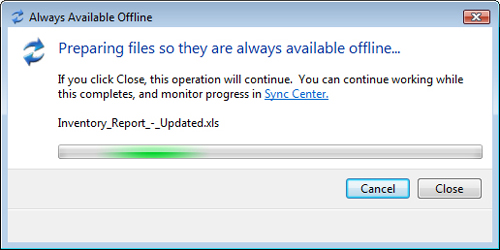
You actually perform the
process of setting up an offline files partnership independently of
Windows Sync Center. To do this, use Windows Explorer to connect to a
shared folder that is located on the network. Then right-click the
folder and select Always Available Offline. Windows Vista automatically
begins to make a local copy of the files in that location (see Figure 7). The icon then appears with a green synchronization icon when viewed in Windows Explorer.
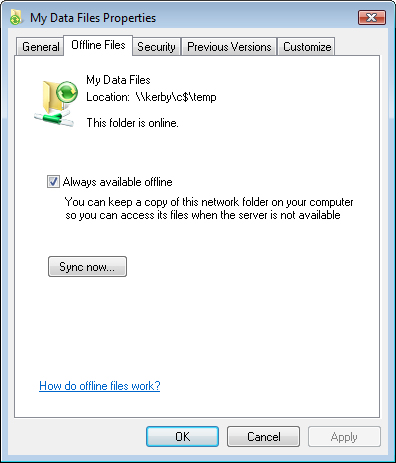
After you enable the
Offline Files feature for a folder, you can access the Offline Files tab
in the folder’s Properties dialog box to view settings. The settings
allow for enabling or disabling the Offline Files feature. A button for
manually starting a synchronization option is included.
You can repeat the
offline folders setup process on as many folders as you need. Whenever
the computer is disconnected from the network, you are still able to
access that folder, using the exact same path that you used to configure
it. Files can then be moved, added, deleted, or changed.
Managing Offline Files
Although the majority of
the work happens automatically when using Offline Files, there are
several configuration options that can be useful. First, the files that
are made available offline take up disk space on the local computer. To
view details about the location of these files, open the Offline Files
application by searching for it in the Start menu. Figure 8 shows the default display.
The General tab
provides the option to enable or disable the Offline Files feature. It
also enables opening Windows Sync Center to view details related to
synchronization status. The View Your Offline Files button opens a
special folder to view locally stored content. You can perform most
file-related tasks by accessing the relevant network folders.
Additionally, you can right-click a folder on which Offline Files is
enabled and select Delete Offline Copy.
The Disk Usage tab
provides important details related to how much space is being used by
all of the offline files on the computer (see Figure 9).
Clicking Change Limits enables you to specify the maximum amount of
disk space this feature can use. Offline Files also uses temporary files
to keep track of data that is stored on computers that are part of a
sync partnership. You can reclaim this space by clicking Delete
Temporary Files.
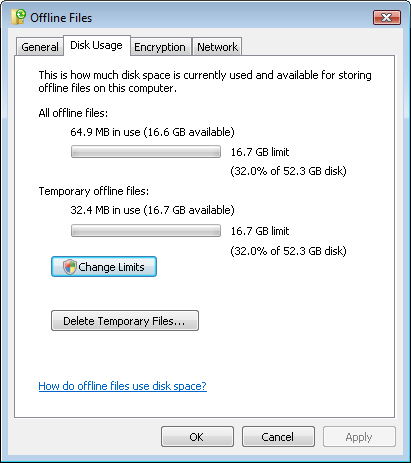
By
default, offline files are stored in a format that is identical to the
original files for performance reasons. You can, however, choose to
encrypt the files so that they remain secure on the mobile computer. The
Encrypt and Unencrypt options are available on the Encryption tab.
Finally, the Network tab in the Offline Files dialog box enables users
to configure the offline version of files to be used automatically when
connecting over a slow connection.
Managing Synchronization Settings
You can use the View Sync
Partnerships link in Windows Sync Center to view all of the folders
configured for offline use. When clicked, the Sync All button
automatically attempts to synchronize data stored in all folders that
are available on the network. If a network connection is unavailable,
then the contents of those folders are not synchronized.
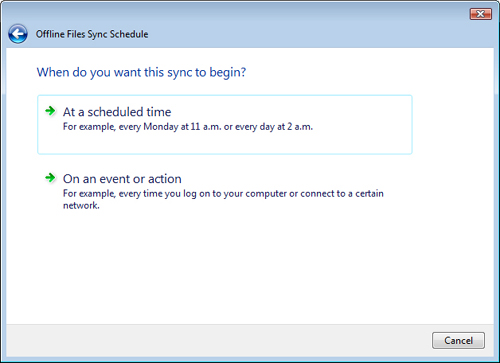
Although manual
synchronization is a useful option, it depends on users’ ability to
remember to perform the operation. Forgetting to synchronize files
before disconnecting from the network can cause users to miss important
file updates. To help reduce this problem, users can choose to schedule
automatic synchronization settings for a partnership. To access these
settings, right-click a sync partnership and select Schedule For Offline
Files. The two main options enable synchronizing at a specific time or
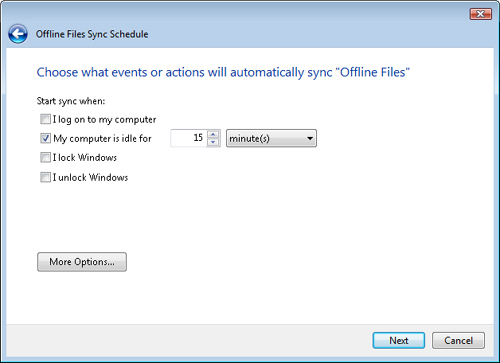
for basing synchronization on specific events (see Figure 10). Figure 11 shows the event options for synchronization.
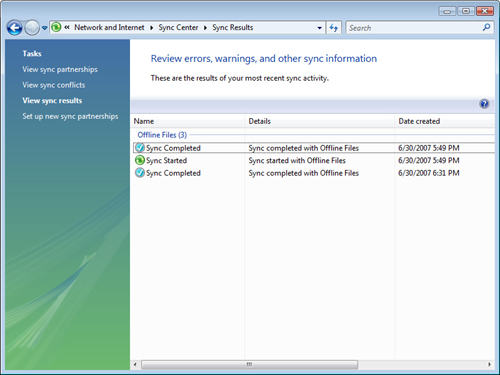
Verifying Synchronizations
To view details related to the status of file synchronizations, click the View Sync Results link. Figure 12 shows an example of the available events and status details.
Although
the majority of changes can be performed automatically, there are
certain situations in which a conflict might occur. For example, if you
choose to modify an offline file when you are disconnected from the
network and another user modifies the online version of the file,
Windows Sync Center is unable to determine which version of the file to
keep. To make a decision, you can click the View Sync Conflicts link.
Items that require manual decisions to be made are listed along with the
possible options.
Overall, Windows Sync
Center and Offline Files folder provide a great way to keep data on
multiple computers and devices consistent and available over time.
