1. Finding Tagged Notes
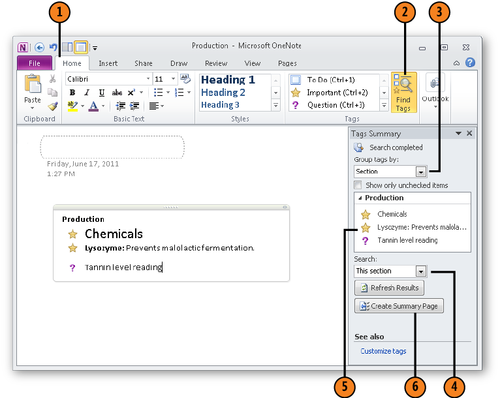
OneNote provides the Tags Summary task pane for locating tagged notes. To open the Tags Summary task pane, go to the Home tab and click the Find
Tags button. After you conduct a search, you can click an item in the
search results and open the page where the tagged note is located.
When you open the task pane,
it lists all tagged notes. Use the task pane to narrow the scope of the
search and tell OneNote how to arrange, or group, items found in the
search.
Group Tags By: Choose
how to list search results in the task pane: under tag names (Tag Name),
section names (Section), or page titles (Title), by date (Date), or in
alphabetical order by note content (Note Text).
Show
Only Unchecked Items: Select this option when searching for tags with a
check box symbol (the To Do tag, for example) to locate only items that
have been checked off.
Search:
Choose a scope for the search. The first five options are for searching
in groups, sections, and notebooks; the last five are for searching in
time periods.
Click the Create
Summary Page button in the task pane to create a new page with a copy
of all tagged items found in your search. Copying the items to a new
page is a convenient way to have a look at all tagged items you found.
Click the Refresh Results button in the Tags Summary task pane when you want to update the results of the search.
1.1. Find Tagged Items
Click the Find Tags button to open the Tags Summary task pane.
In the Group Tags By menu, choose Section to arrange the search results by section name.
In the Search menu, choose This Section.
Click a tagged item in the search results to go to the page where the item is located.
Click the Create Summary Page button.
Warning:
Clicking the Create Summary
Page button creates a new page with copies of tagged items you found in
your search. These items are only copies. They are not synced with the
originals, and changing an original does not alter its copy on the
summary page.
2. Color-Coding Notebooks, Sections, and Pages
Color-code
notebooks, sections, and pages to make it easier to recognize and find
notes. For example, to distinguish notes pertaining to a specific
project, make pages where those notes are kept green. To quickly
identify a section by color, color-code it with a specific color.
Use these techniques to color-code:
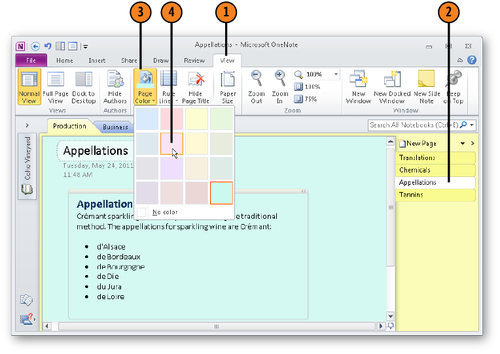
Page: Select a page, go to the View tab, click the Page Color button, and select a color on the gallery. The page is given a background in the color you selected.
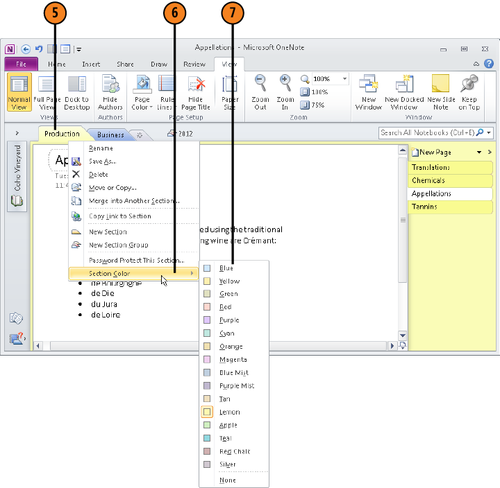
Section: Right-click the section tab, choose Select Color on the shortcut menu, and select a color on the submenu.
Notebook:
Right-click the notebook’s name and choose Properties on the shortcut
menu. Then, in the Notebook Properties dialog box, open the Color
gallery and select a color. Then click OK. The icon next to the
notebook’s name appears in the color you selected.
2.1. Color-Code a Page and Section
Open the page that needs a new color.
Click the Page Color button.
Choose a color on the gallery.
Right-click a section tab.
Select a color on the submenu.