The judicious use of color and fill patterns can add
considerable value to your Visio drawings. For example, you might add
color or patterns to differentiate among similar shapes, call attention
to specific features, highlight patterns or trends, or simply to make a
drawing more attractive.
You can use several
techniques to add color and style in Visio. Some apply a change to a
single shape attribute, and others change multiple characteristics at
once.
In this exercise, you will
add color and fill patterns to individual shapes. Note that the results
of this exercise won’t be a diagram you would want to provide to
anyone—it will be aesthetically challenged; however, it will let you
experiment with many different colors, patterns, and styles.
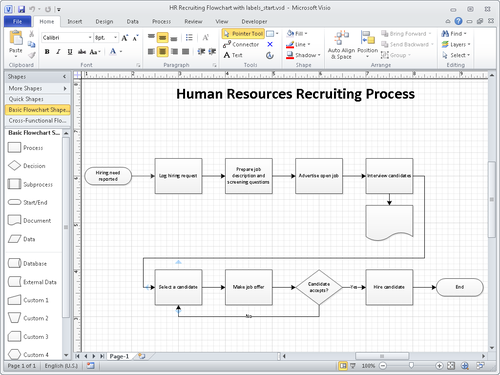
Narrow the Shapes window to one column. Set the zoom level to 100% and center the drawing on the screen to make all flowchart shapes visible.
Fill

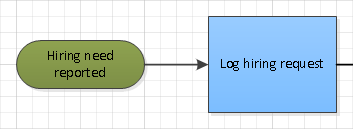
Right-click the Hiring need reported shape, click the arrow to the right of the Fill button on the Mini Toolbar, and then click any shade of green for this start shape.
Tip:
Note that Live Preview is active in the color picker dialog box, so you can preview each color before selecting one.
Right-click the Log hiring request shape, click the arrow to the right of the Fill button on the Mini Toolbar, and then click More Colors.
Tip:
In this exercise, you will be
selecting fill colors and patterns using the Mini Toolbar that appears
when you right-click a shape. You can access all of the same functions
by clicking the Fill button in the Shape group on the Home tab.
The
resulting Colors dialog box offers two tabs, Standard and Custom, from
which you can choose virtually any color to add to your shape.

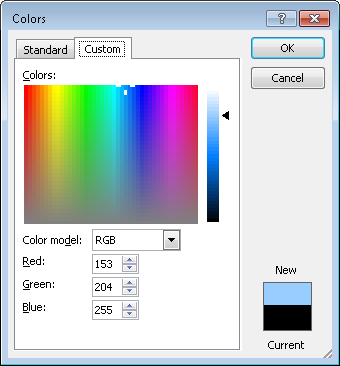
On the Standard tab of the Colors dialog box, click a light blue color, and then click OK. Your first two shapes should look something like the following graphic.
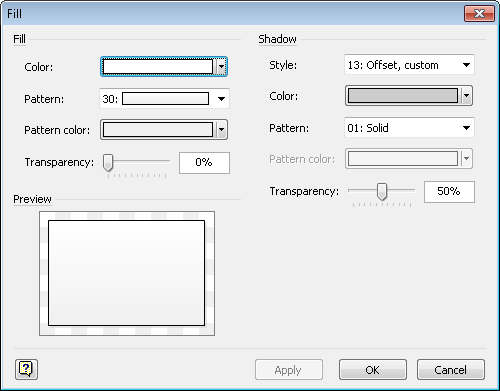
Right-click the Prepare job description and screening questions shape, click the arrow to the right of the Fill button on the Mini Toolbar, and then click Fill Options to open the Fill dialog box. All
of the preceding steps allowed you to change exactly one attribute at a
time. With the Fill dialog box, you can change multiple attributes at
once. For example, in this dialog box, you can create two-color shapes
with various fill patterns, as well as set partial or full transparency.
On the right side of the dialog box, you can set shadow attributes.
Tip:
You can also open this dialog box by right-clicking a shape, selecting Format, and then clicking Fill.
Tip:
If you’ve used previous
versions of Visio, you may recognize this dialog box because it has been
brought into Visio 2010 unchanged.
Depending
on the resolution of your monitor, it may not be obvious that the
flowchart shape you’ve selected has a fill pattern. However, the 30 in
the Pattern field indicates that it uses pattern number 30. The pattern
is difficult to see because the primary fill color is white and the
pattern color is gray. You will make the pattern more obvious by
changing one of the two colors in the next step. In the Fill section of the dialog box, click the Color arrow, and select the violet color in the upper-right of the color palette. (This color is labeled Accent5
if you point to it.) Having selected a color, you can see in the
Preview section of the dialog box that there is indeed a fill pattern
that fades from top to bottom.

In the Pattern list, select fill pattern 35. This pattern fades from the outside toward the center, which should allow the text in the shape to remain legible.

Tip:
If you want to reverse the
fill pattern, that is, to have the shape darker in the center and
lighter toward the edges, simply swap the color selections for Color and
Pattern Color.
Click OK.

Repeat Steps 6-8 for the Advertise open job shape, but this time, use the Transparency slider control to set the fill transparency to 50% before clicking OK. The transparency setting should make the text in the shape easier to read but still add a bit of flair to the shape. Repeat Steps 6-8 for the Interview candidates shape; use the Pattern list to select pattern number 06 and use the Pattern color list to select Black. Then click OK.
Tip:
There are more than three dozen
fill patterns in the Pattern list, involving lines, fades, and other
effects. Take a moment to explore some of the choices so you will know
what is available for future use.
The
top row of your flowchart should now look something like the following
figure. It’s clear that this flowchart won’t win any awards for design,
but it has served its purpose by showing you what is possible with Visio
shapes.

Note:
Save your changes to the HR Flowchart with colors and styles drawing and continue with the next exercise.
|
