1. Editing Existing Hyperlinks
You can both edit and delete existing hyperlinks.
In this exercise, you will change the description of an existing hyperlink.
Tip:
If you use the
right-click method to open the Hyperlinks dialog box, you might notice
that the menu entry that formerly said Hyperlink now says Edit
Hyperlinks.
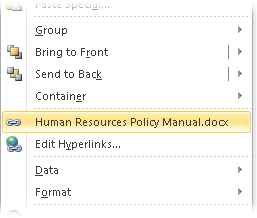
Select
the hyperlink you want to change if it is not already selected. When it
is selected, the hyperlink’s details will appear in the appropriate
boxes at the top of the Hyperlinks dialog box.
In the Description text box, type HR Policy Manual.
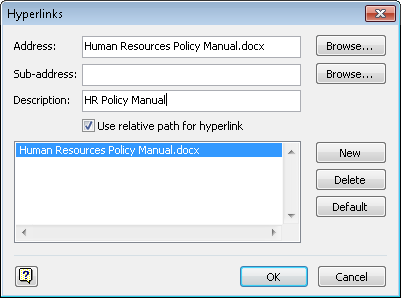
Click OK.
The next time you point to or right-click the hyperlinked shape, you will see the new description text.
Note:
Save your changes to the HR Process Map drawing but leave it open to continue with the next exercise.
Tip:
You can change the hyperlink
destination for any existing link by clicking the Browse button to the
right of the Address text box whenever you have the Hyperlinks dialog
box open.
You can delete a hyperlink by selecting it in the Hyperlinks dialog box, and then clicking the Delete button.
2. Adding Multiple Hyperlinks
You can add more than one hyperlink to any object in Visio, offering your reader a choice of places to go or documents to view.
In this exercise, you will add a second hyperlink to a shape that already contains a hyperlink.
Click the New button.
Hyperlink2 appears below HR Policy Manual in the Hyperlinks dialog box.
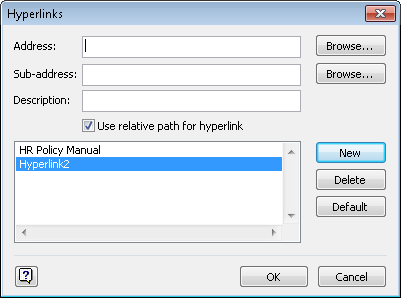
Create a hyperlink and then click OK.
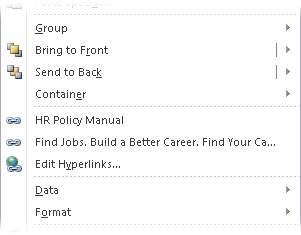
If you’ve added more than one hyperlink to a shape, Visio notifies you of their existence when you pause on the linked shape.
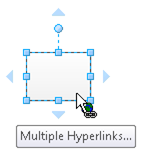
Visio also displays the
description of each hyperlink when you right-click a linked object.
Notice that the previous link, HR Policy Manual, is now followed by the
title of a web hyperlink.
Note:
Save and close the HR Process Map drawing.