Configuring the BizTalk endpoints
In this part of the exercise, we will configure the
BizTalk messaging ports that receive the query request, call Dynamics
CRM 2011, transform the response message, and emit the canonical Customer message to disk via a FILE adapter.
Open the BizTalk Administration Console and find the Chapter3 application.
Add a new Receive Port (Chapter3.PickupCustomerQuery) and Receive Location (Chapter3.PickupCustomerQuery.FILE) to the application which will pick up a "query request" message from the file system.
Right-click the Chapter3 application and choose Import and then Bindings. Point to the OrganizationService_Custom.BindingInfo.xml
binding file that was generated by referencing the Dynamics CRM web
service and now sits inside the BizTalk project in Visual Studio. When
the import is complete, a new send port is displayed.

Double-click the new send port to observe its settings. Notice that it uses the WCF-Custom
adapter and applies a custom WCF binding. The service is called using
the credentials of the send port's host instance, so we do not need to
add credentials to the send port itself.
Add
a new send port that will emit Dynamics CRM response message. This
one-way send port uses the FILE adapter and sends a message to the file
system.
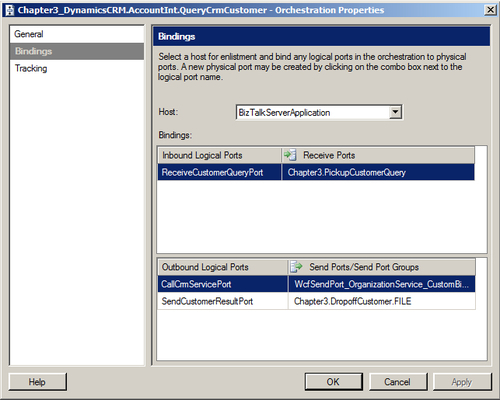
With the messaging ports in place, we now bind the orchestration to these ports. View the Orchestrations folder in the Chapter3 application and double-click the QueryCrmCustomer orchestration.
Bind the orchestration to the host, the newly created receive port, the generated send port, and the FILE send port.

Start the receive location, send port, and orchestration.
We now have a channel for picking up the "query"
message, a send port that calls Dynamics CRM 2011, and a send port that
sends out the service result.
Recall that the primary field in the query message
into Dynamics CRM is the ID of the record. Therefore, an XML instance is
needed for the Customer message with only the ID value populated.
Navigate
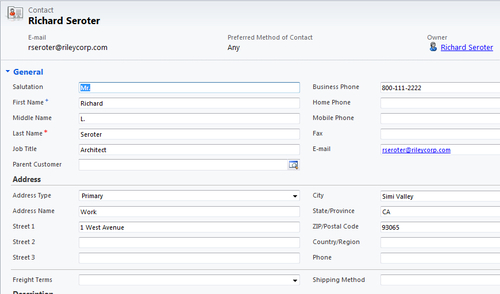
to your Dynamics CRM 2011 instance and open up the customer record you
wish to query. Look at the address in your browser and retrieve the
record's GUID and remove the URL encoding.

Add the record ID to the ID field of the generated instance of a Customer_XML message.

Copy the XML instance file to the folder being polled by the BizTalk receive location.
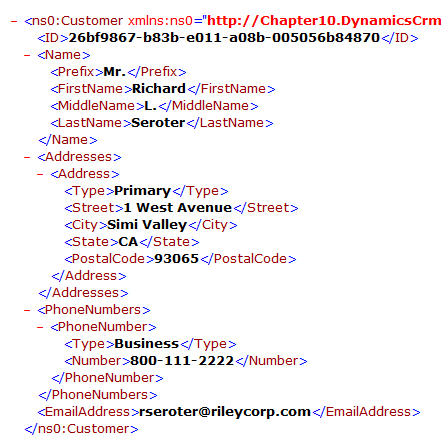
Observe
the file folder where the send port transmits the final message. We
should see a message containing the values from Dynamics CRM formatted
in the Customer_XML message&;.

What we saw here was how to create mappings to the
Dynamics CRM "retrieve" message, how to put the unstructured results of
that query into a structured format, and how to set up the BizTalk
components necessary to route and invoke the request. Next up, we will
see how to add records to Dynamics CRM from BizTalk Server.
Adding New Records to Dynamics CRM from BizTalk Server
We have already seen how the untyped schemas
associated with the Dynamics CRM 2011 SOAP endpoint can make mapping a
challenge. Specifically, we just saw how to take the untyped message
from DynamicsCRM and convert it to a structured, canonical schema. But
what about taking a canonical schema and mapping it to an untyped
message? In this exercise, we will take the Customer_XML message and map it to the Dynamics CRM Create message and add a record to our DynamicsCRM instance.