Building the BizTalk components
In this set of steps, we consume the proxy service
from our BizTalk project and create the map necessary for translating
our canonical schema to the format expected by the service:
Back
in Visual Studio 2010, navigate to the existing BizTalk Server project.
We will add a reference to this new WCF service and configure the
BizTalk component needed to call the proxy service. Right-click the
BizTalk project and choose to Add and then Add Generated Items.
Walk
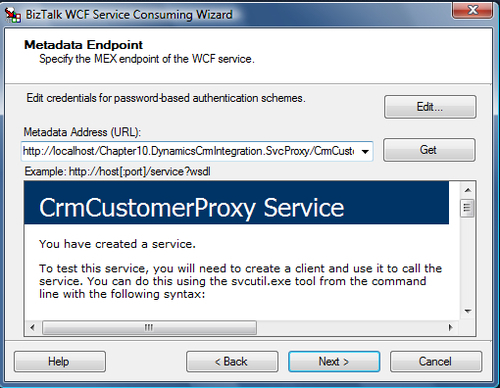
through the BizTalk WCF Service Consuming wizard and select the
metadata source to be a MEX endpoint. On the following page, set the
address to the web address of our WCF service:
Complete
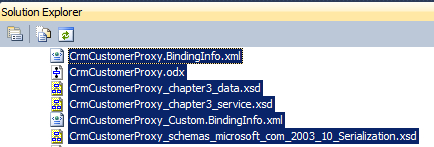
the wizard and observe the new artifacts included in our solution. This
includes binding files, schemas, and an orchestration:
Right-click the BizTalk project and add a new item of type Map and name the map Customer_To_CrmContactProxy.btm.
Set the source of the map to the Customer_XML and the destination to Chapter3-DynamicsCRM.AccountInt.CrmCustomerProxy_chapter3_service and choose the AddCustomer root node.
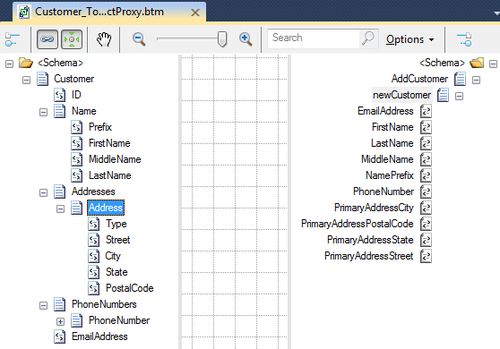
Connect the applicable source nodes to the corresponding destination field.
We
are consuming this service directly from BizTalk messaging and
therefore we do not need to build an orchestration to call the proxy
service. Build and deploy the BizTalk project to the BizTalk Server.
This set of steps produced the BizTalk artifacts we
needed to call the façade service sitting in front of Dynamics CRM. As
opposed to the previous exercises where we had to creatively transform
untyped schemas, this set of service schemas are strongly typed and easy
to work with.
Configuring the BizTalk endpoints
Up next, we are going to configure the BizTalk messaging components that call the service and route the response:
Open the BizTalk Administration console and ensure that the new proxy service schemas are part of the Chapter3 application.
When
we created a service reference to the proxy service, the BizTalk WCF
Service Consuming wizard generated a binding file that defines a send
port capable of calling the proxy service. Right-click the Chapter3 application and choose to import a binding and select the CrmCustomerProxy_Custom.BindingInfo.xml file included in our BizTalk project.
Open
the generated send port. There are no changes needed to the port's
configuration, but we will add our new map, and a filter, to this send
port. On the Outbound Maps tab of the port configuration, select the Contact_To_CrmContactProxy map.
Switch to the Filters tab and add a subscription for the message type of the Customer_XML type.
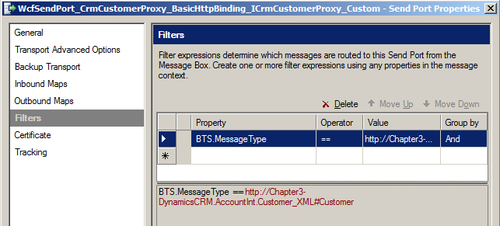
Our
last configuration item is the send port, which listens for the response
from this service call and sends a message to the file system. Create a
new one-way, static send port. Set the adapter to FILE and set the
location where the send port will send the response message. Go to the Filters tab of the port configuration. Here, we will add a subscription to the response message type.
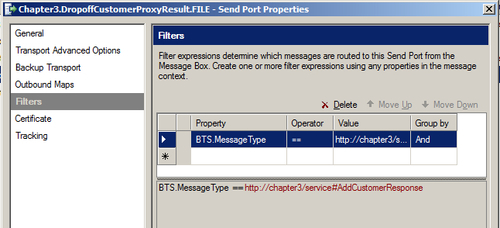
Un-enlist all the previously defined send ports and orchestrations in order to eliminate any side effects from using the same Customer_XML message type as input.
Send a file containing a customer definition into BizTalk Server:
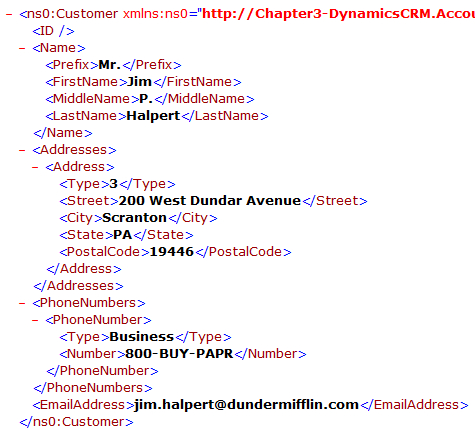
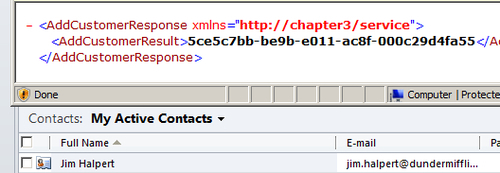
As a result, we should see our new record in Dynamics CRM and a file on disk that holds that record's identifier.
