Configuring the BizTalk endpoints
Our final task is to configure the BizTalk messaging
components to send a message to the Dynamics CRM service. We already
have a series of reusable ports configured as a result of our last
exercise and can leverage those this time around.
Open
the BizTalk Administration Console and confirm that the updates to our
application were successfully deployed. This can be confirmed by looking
for our new orchestration under the Orchestrations folder beneath the Chapter3 application.
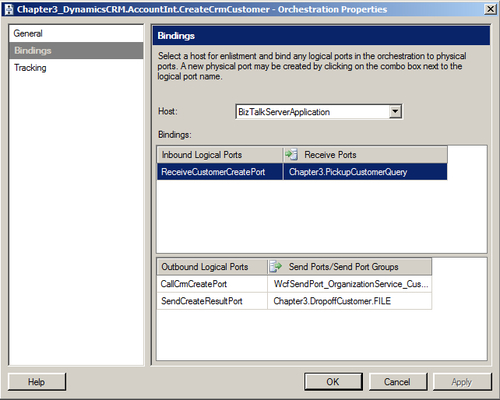
Double-click the orchestration to bind it to messaging ports.
Set
the host value, and for the initial receive port, reuse the port
created in the previous exercise. When a receive port is bound to an
orchestration, the resulting subscription looks at both the name of the
port and the message type coming in. So, in this case, because we are
using a Customer_XML message input for both types, we have to
un-enlist the previous orchestration to prevent it from picking up this
message as well.
Set
the orchestration to also reuse the send ports from the previous
exercise. This includes the generated send port which calls Dynamics
CRM, and the port that sends the service result message to the file
system.

Start
the orchestration, and ensure that the receive location, send ports, and
host are also started. Remember to un-enlist the previous orchestration
so that it does not pick up the message as well.
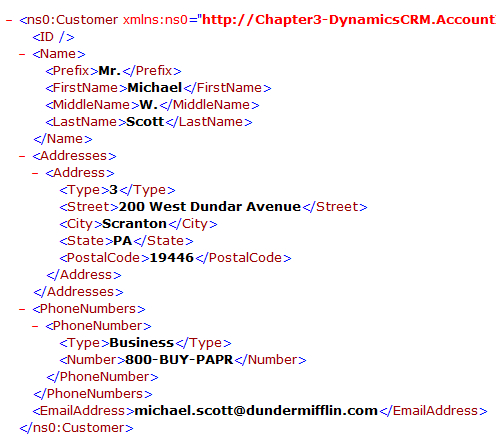
Create an XML instance file for the Customer_XML message type&; and populate it with details of a new contact that does not yet exist in Dynamics CRM.

Drop this file into a folder being monitored by our FILE receive location.
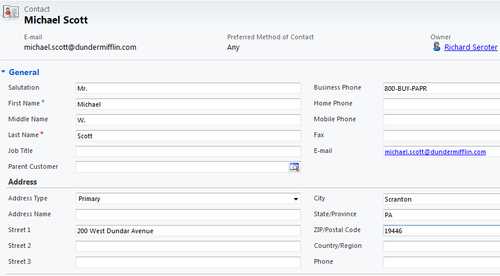
If
everything is configured correctly, we should see both a new record in
our Dynamics CRM instance, and a file that holds the unique ID of that
new record.
