Choosing to perform a server migration instead of
in-place upgrade has some advantages you should consider. Performing a
migration does require two servers; however, this is one of the
advantages. On the server you will be migrating to, you will perform a
clean install of Windows Server 2008 R2, and clean installations will
exhibit more stability than upgraded servers. Migrations also reduce the
risk of downtime in your server environment and offer a fallback plan.
During migration, the server being migrated is still running, and if the
migration fails, you can start all over with the new server without
impacting your environment. Lastly, migration allows you to do
performance and benchmarking testing prior to fully completing the
migration.
Windows Server 2008 R2 migration can be used successfully in these three scenarios:
x86 to x64 scenarios As mentioned earlier, Windows Server 2008 R2 is available only in 64-bit. Migration is the only method for the x86 hardware.
Virtual server to physical server and physical server to virtual server
If you are looking to virtualization for some of your server components
in your current environment, then migration is the way to go. Likewise,
if you are looking to move some of your virtual servers to the physical
systems, migration offers another great pathway for you.
Core Server to full server and full server to Core Server,
you can perform this type of upgrade only on Windows Server 2008 R2
servers. Migration is the only way to move from a Server Core
installation to a full installation of Windows Server 2008 R2. You can
also turn a full server into a Server Core through this process.
However, make sure your roles on the full server will be supported by
Server Core.
Migration can be from x86 or x64 systems and will support the following source operating systems:
Windows Server 2003
Windows Server 2003 R2
Windows Server 2008, full server only
Windows Server 2008, R2 full server or Server Core
NOTE
Windows 2008 Server
Core is not supported for migration since Server Core has no .NET
Framework support. Additionally, the system language on both the source
and the target have to be the same. For example, if the source server's
system language is English and the target server is in Spanish, then the
migration tools will not work.
Migration can be performed for the following roles, features, settings, and data:
Prior to performing the migration, you need to install the Windows Server 2008 R2 migration tools.
1. Install Windows Server 2008 R2 Migration Tools
The migration tools are new and
provide a much improved resource for successfully migrating your
environment. You will install the migration tools first on the target
Windows Server 2008 R2 server and then on the source server. Prior to
installing the migration tools, make sure the source servers meet the
system requirements listed in Table 1, and verify you are, at the minimum, a member of the Administrators group on the target and source servers.
Table 1. Migration Tool System Requirements
| Source Server OS | Requirements |
|---|
| Windows Server 2003 or Windows Server 2003 R2 | 25MB free drive space~LB.NET Framework 2.0~LBWindows PowerShell 1.0 or later |
| Windows Server 2008 or 2008 R2 | 23MB free drive space~LBWindows PowerShell or the Server Manager command-line tool (ServerManagerCmd.exe) |
First you need to install the
migration tools on the Windows Server 2008 R2 target server. After the
tools are installed on the target server, then you will need to create
deployment folders on the target server for the source server. Lastly,
to complete the installation, you will need to register the Windows
Server migration tools on the source servers. You will see how to
install the tools via Server Manager:
Open
Server Manager (you can also install the tools via PowerShell if you
are running Windows Server 2008 R2 Server Core) on the target server,
click Features, and then select Add Features. You will see the Add
Features Wizard, as shown in Figure 1.
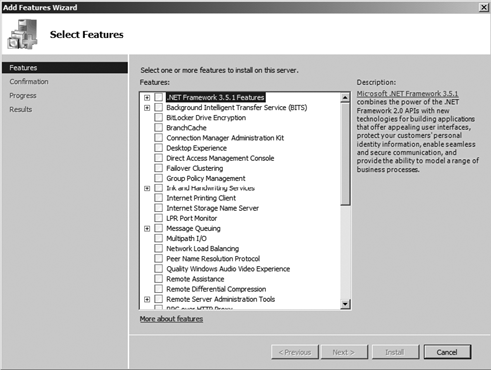
You
may need to scroll down to select Windows Server Migration Tools. After
you select Windows Server Migration Tools, click Next.
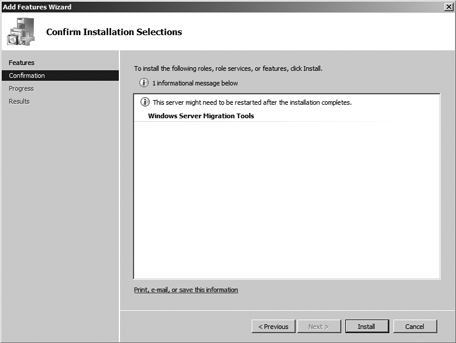
You will see a screen similar to Figure 2.
Click Install to install the tools after the installation, review the
summary, and then click Close. Additionally, installing the tool set may
require you to restart the server, so please plan accordingly.
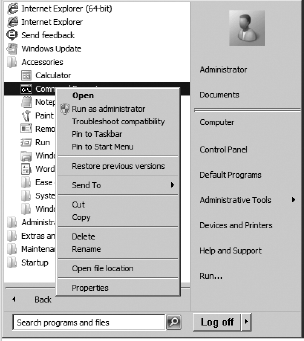
After
the tools are installed, you need to create the deployment folders on
the target computer. To do this, first you need to open an administrator
command prompt. Select Start => All Programs => Accessories, right-click Command Prompt, and select Run As Administrator, as shown in Figure 3.
Create a deployment folder on the target computer to hold the migration tools; for the following examples, I used c:\migration. This folder can also be a network path.
In the command prompt window, change to the Server Migration Tools directory. The directory by default is located at c:\windows\system32\ServerMigrationTools\ (if you installed to the default directory on the C drive). To get there quickly, you can enter the command cd %windir%\system32\servermigrationtools\ and press Enter.
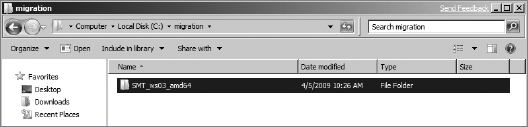
Depending
on what architecture and operating system your source system is
running, you will then need to run one of the following commands. The
command will create a directory with the migration tools in it, as in Figure 4, which shows a directory created for a 64-bit version of Windows 2003 with the name of SMT_ws03_amd64:
If your server is 64-bit Windows Server 2003, type this command and hit Enter:
SmigDeploy.exe /package /architecture amd64 /os WS03 /path c:\migration
If your server is 64-bit Windows Server 2008, type this command and hit Enter:
SmigDeploy.exe /package /architecture amd64 /os WS08 /path c:\migration
If your server is x86 Windows Server 2003, type this command and hit Enter:
SmigDeploy.exe /package /architecture X86 /os WS03 /path c:\migration
If your server is x86 Windows Server 2008, type this command and hit Enter:
SmigDeploy.exe /package/ /architecture X86 /os WS08 /path c:\migration
Copy
the folder created in step 7 to a local directory on the source
computer so you can register the tools with the source server.
On
the source server, open a command prompt. If the server is Windows
Server 2003, just run the command. However, if the source server is
Windows Server 2008, you will need to run an elevated command prompt. To
do that, select Start => All Programs => Accessories, right-click Command Prompt, and select Run As Administrator.
Change to the directory you copied the files to in step 8.
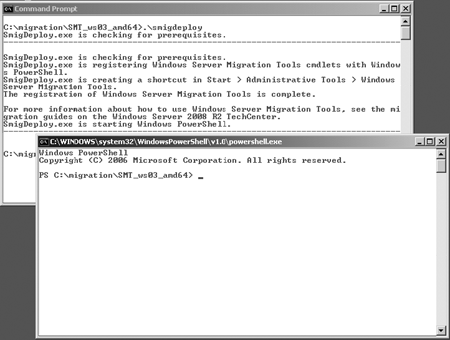
Type .\Smigdeploy.exe,
and hit Enter to register the tools. When this command is complete, you
will see a status message, and a Windows PowerShell window will open.
You will see a screen similar to Figure 5.
After you install the migration tools, it is then time perform the migration.
2. Migrate to Windows Server 2008 R2
Regardless of the feature or
role you will be migrating to Windows Server 2008 R2, you will follow
three general steps after you install Windows Server 2008 R2 on the new
target server:
Export the settings from the source server to temporary storage.
Import the settings to the target server from temporary storage.
Transfer any data and shares from the source server to the target server.
