Creating a Category
After you create a policy, it
should be categorized. Categorization allows you to group policies into
administrative or logical units and then allow database objects to
subscribe to specific categories. It is worth mentioning that server
objects can’t subscribe to policies.
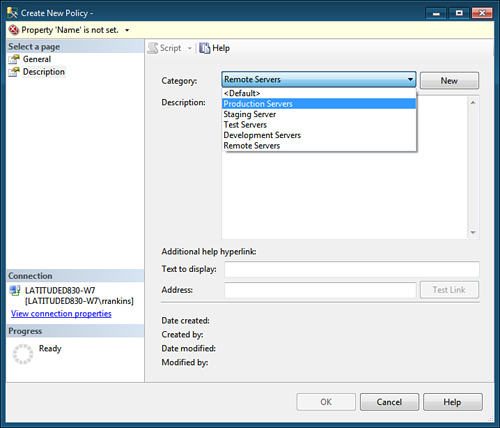
To create a category, click on
the Description page in the Create New Policy dialog. Policies can be
placed in the default category or a specific category, or you can create
a new category. Specifying a category is illustrated in Figure 4.
You can also create categories by right-clicking on Policy Management and selecting Manage Categories.
If you choose to create a new
category, click on the New button. This presents a dialog that allows
you to name the category. By default, this policy is parked in the new
category.
You can also select which
category you want policies to belong to by selecting a specific category
in the drop-down box. After you categorize your policies, you can
select which categories you want your database to subscribe to.
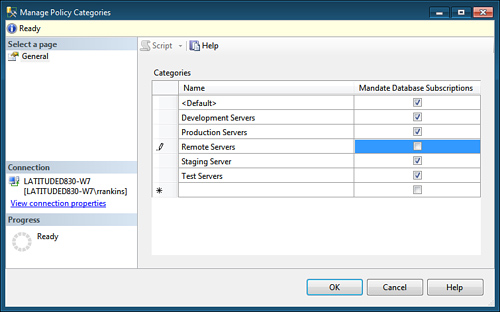
Right-click on the Policy Management folder and select Manage Categories. The Manage Policy Categories dialog (illustrated in Figure 5)
appears. Check the categories to which you want all databases on your
server to subscribe and deselect the ones that you do not want your
server database to be subscribed to by default.
Other than the default
category, DBAs can select which category (and policies belonging to that
category) they want their databases to subscribe to. For example, if
you have third-party software that does not follow your naming
standards, you should ensure that the policies that enforce your naming
standards are not in the default category. Then selectively have each of
your user databases on your server subscribe to these databases.
Evaluating Policies
After
you create an organization’s policies and categories, you need to
evaluate them to determine which of your servers and databases are out
of compliance. There are three management points that can be leveraged
to evaluate policies:
For
the first alternative, right-click on a server, server object,
database, or database object in SQL Server Management Studio 2008 and
select Policies and then Evaluate.
For the second alternative, expand the Management folder, expand Policy Management,
right-click on Policies, and select Evaluate. In the Evaluate Policies
page displayed, check the policy or policies you want to evaluate and
click the Evaluate button. It is also possible to select an individual
policy. To do so, in the Policy folder, right-click on it and select Evaluate.
Finally,
the preferred way to evaluate all your servers, or a group of your
servers, is to connect to display the Registered Servers list in SSMS.
Expand the Central Management Servers node and right-click on the name
of a Central Management Server and select Evaluate Policies. The
policies you select to evaluate are evaluated on all SQL Servers defined
on that Central Management Server—for example, all member servers in
all Server Groups. If you select a Server Group, all member servers in
that Server Group are evaluated. To evaluate the policies, you need to
right-click on the Central Management Server, Server Group, or even
Member Server and select Evaluate Policies.
When you right-click on the
Central Management Server or Server Group and select Evaluate Polices,
you are presented with a dialog that prompts you for a source, with a
Choose Source prompt. For Select Source, enter the server name into
which you have imported your policies or browse to a file share. Then
highlight all the policies you want to import and click on the Close
button to close the dialog.
After the policies are
imported, you can select the individual policies you want to run and
click Evaluate. The policies are then evaluated on the member servers,
and the results are displayed in the Evaluation Results pane, as
illustrated in Figure 6.
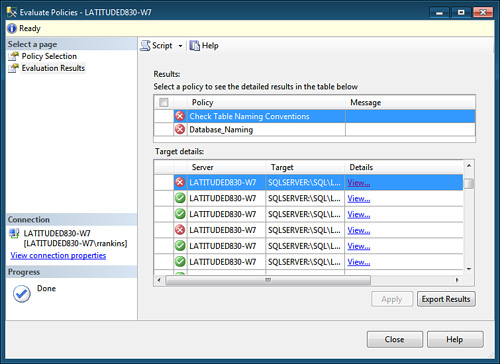
The Evaluation Results
pane displays servers where a policy has failed. In the Target Details
section, there is a View hyperlink, which allows you to browse to get
more details on why the individual target server and policy target
failed compliance to the policy you evaluated.
Importing and Exporting Policies
In some situations a DBA
might want to export one or many policies with their conditions from one
or many SQL Server systems and import them to another SQL Server
instance or system. Fortunately, you can perform this task easily with
an export and import wizard that generates or reads the policy
definitions as XML files.
Follow these steps to export a policy with SQL Server Management Studio:
1. | In Object Explorer, expand the Management folder, expand the Policy Management node, and then expand the Policies folder.
|
2. | Within the Policies folder, right-click a desired policy to export and then select Export Policy.
|
3. | In the Export Policy dialog, specify a name and path for the policy and click Save.
|
Importing a policy from an XML file is just as simple. Follow these steps to import a policy with SQL Server Management Studio:
1. | In Object Explorer, expand the Management folder, expand the Policy Management node, and then select Policies.
|
2. | Right-click on the Policies folder and select Import.
|
3. | The import screen has three options you need to be aware of:
- a. First, provide the path of the file to import.
- b. Second, enable the option Replace Duplicate Items When Imported.
- c. Finally,
in the Policy State drop-down box, specify the state of the policy
being imported. The options include Preserve Policy State on Import,
Enable All Policies on Import, and Disable All Policies on Import.
|
