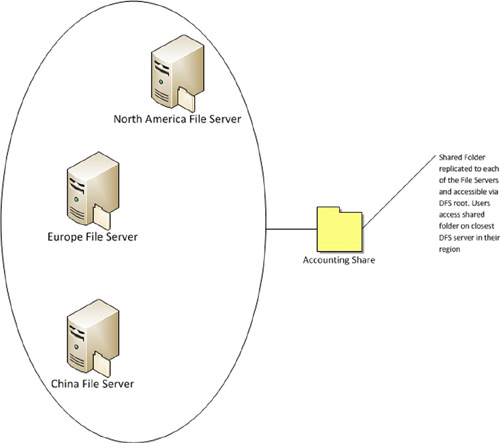
DFS was first introduced in
Windows 2000 as a way to provide centralized access to network share
folders located on different file servers throughout the network.
Instead of accessing a server and share, users simply access the DFS
access point which connects them to the correct
shared folder. Additionally, DFS can provide shared folder redundancy
by having several replicated copies of a single shared folder. DFS
Replication (DFSR) was first introduced as a feature in Windows Server
2003 R2 and DFSR provides the ability to replicate a single shared
folder between different file servers to provide redundancy and
centralized management of shared folders. Both DFS technologies exist in
Windows Server 2008 R2 as role services for the file server role. Using
a combination of DFS Namespaces and DFSR, you can provide a more
manageable, centralized, and highly available file-sharing
infrastructure. Figure 1
depicts what a typical DFS share might look like. In this section, we
will explore the aspects of creating, configuring, and administering DFS
Namespaces and DFSR.
|
DFS compatible applications
Some applications are not compatible with DFS. You
will want to verify with the software vendor to ensure that you can run
an application that may access files from a DFS share.
|
Configuring and administering DFS Namespaces
DFS Namespaces are used to publish shared folders
under a single directory structure. Before setting up a new DFS
Namespace, we need to add the DFS Namespace role service. If the server
that you plan to set up DFS on already has shared folders, you will not
need to add the file services role but only the DFS Namespace role
service. Windows Server 2008 R2 supports two namespace types:
Domain-based namespace
—A domain-based namespace stores the DFS configuration in Active
Directory providing redundancy and high availability to the DFS tree.
This effectively removes the DFS root server as a single point of
failure. If the domain functional level is at least
Windows Server 2008 and the forest functional level is at least Windows
Server 2003, then Windows 2008 DFS mode can be used for domain-based
Namespaces providing additional features such as ABE and increased
scalability.
Stand-alone namespace
—A stand-alone namespace stores DFS configuration on the local
computer. High availability and redundancy can be achieved by using
Windows cluster features.
To add the DFS Namespace role service, perform the following:
1. | Open Server Manager and select the node Roles | File Services.
|
2. | In the middle pane click the link Add Role Services.
|
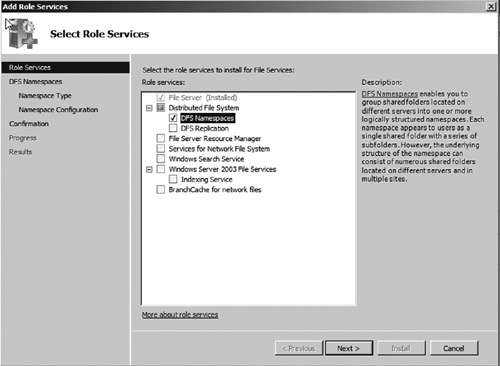
3. | Select the DFS Namespaces option as seen in Figure 2. Then click Next.
|
4. | You can now choose to create a new DFS Namespace or create the namespace later. For this exercise, select the option Create namespace later using the DFS Management snap-in in Server Manager. Then click Next.
|
5. | Click Install to install the DFS Namespace role service.
|
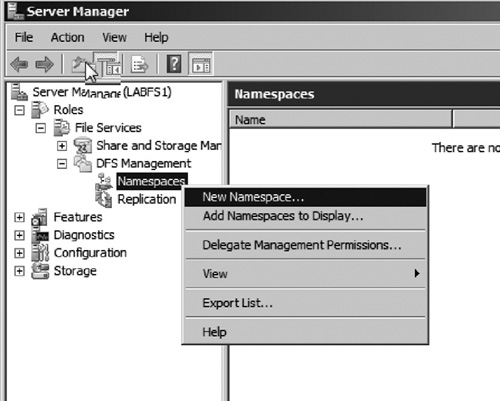
Once the DFS Namespace role service has been
installed, DFS Namespaces can be created and managed from Server Manager
by selecting the node Roles | File Services | DFS Management | DFS Namespaces. To create a new DFS Namespace, perform the following:
1. | Right click on the DFS Namespaces node and select the option New Namespace (see Figure 3). This will launch the New Namespace Wizard.
|
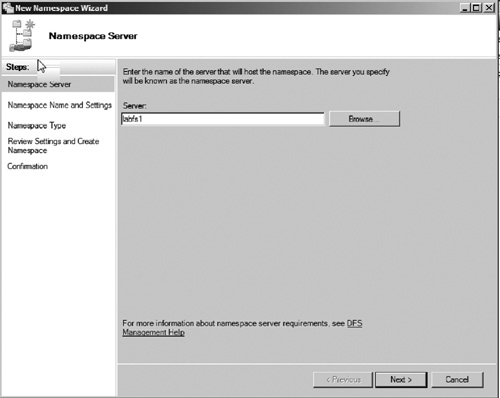
2. | Select the server that will host the DFS Namespace (see Figure 4). This can be a Windows cluster to provide high availability. Then click Next to continue.
|
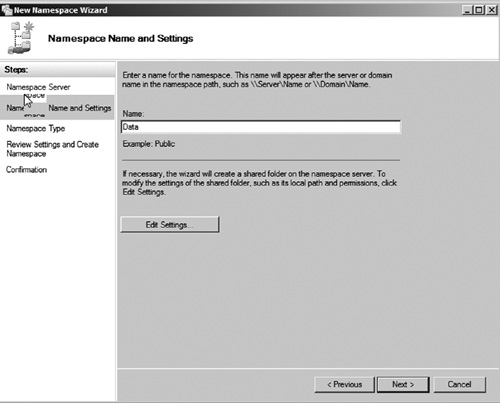
3. | Enter a name for the Namespace (see Figure 5).
This is the name by which the namespace will be referred to by clients.
Additionally, you can set permissions on the DFS root by clicking the Edit Settings button. In most cases, the default option of All users have read-only permissions will be sufficient as this access is for DFS only and not the target shared folder within the tree. Click Next to continue.
|
4. | We now need to select the DFS Namespace type. In our example, we will use a domain-based namespace. Select the option Domain-based namespace, and select the option Enabled Windows Server 2008 mode (see Figure 6). Then click Next.
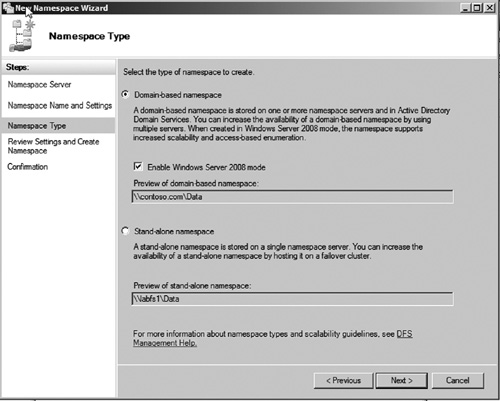
|
5. | Verify the configuration settings and then click Create. You should receive a confirmation that the namespace was created successfully.
|
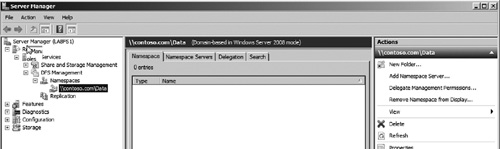
The namespace will now appear in Server Manager under the Namespaces node as seen in Figure 7. Notice that DFS Namespaces are accessed using the Active Directory domains FQDN and namespace name (\\contoso.com\Data).
You can now create folder targets underneath the
namespace. These folder targets will link to shared folders on file
servers across your corporate network. To create a new target folder
underneath the namespace, perform the following:
1. | Right click on the namespace and select the option New Folder.
|
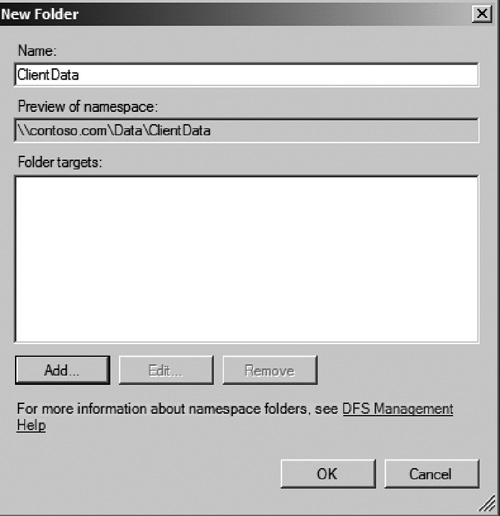
2. | Enter a name for the new folder (see Figure 8). Then click Add.
|
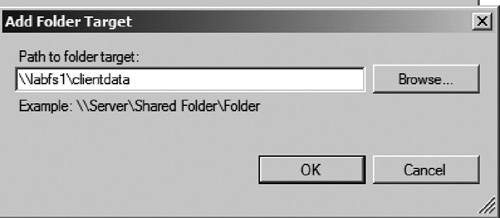
3. | Enter the UNC path to the shared folder you wish to add to the DFS Namespace (see Figure 9).
If there are multiple redundant file shares, you can add each share to
the folder targets list. After adding all targets, click OK.
|
4. | Click OK again to create the folder under the DFS root.
|
You have now added a target
folder that links users to the shared folder ClientData on the server
labfs1. This shared folder can be accessed by simply browsing the DFS
root and selecting the ClientData folder. This folder will refer the
client to the ClientData folder on the appropriate file server. In this
case, the server would be labfs1. You can create links to other shared folders on various servers on your network. They can then be accessed via the DFS root\\domain FQDN\DFS Root Name.
