6.2.4. Using Microsoft Deployment Toolkit 2010
Compared to Windows 7 AIK, which is a set of individual tools, MDT 2010 is more of
a unified deployment environment. However, MDT 2010 is also a superset of Windows 7
AIK. You must install Windows 7 AIK along with MDT 2010, and the MDT procedures
utilize the AIK tools.
At the highest level, the MDT deployment procedure is essentially the same as that
with Windows 7 AIK. You create and configure a reference computer, capture an image
from it, and then deploy the image to your target workstations. However, MDT 2010
streamlines the method by which you perform these tasks, thanks to the capabilities
of the Deployment Workbench tool.
MDT 2010 supports two deployment models, the Lite-Touch Installation (LTI) and
the Zero-Touch
Installation (ZTI). As the names imply, an LTI deployment requires a
minimal amount of user intervention at the workstation, while the ZTI requires none.
The basic steps in an MDT 2010 LTI workstation deployment are as follows:
Create a build computer.
As with Windows 7 AIK, you need a computer on which to install MDT 2010 and
the other software it requires, including Windows 7 AIK.
Create a deployment share.
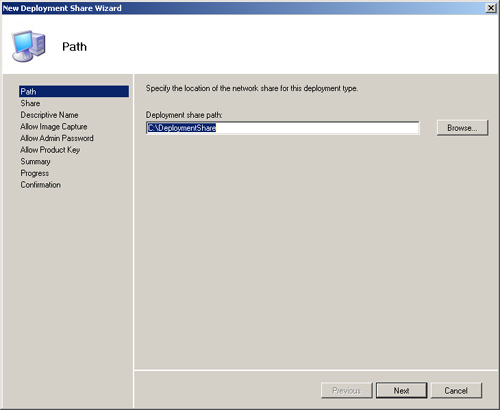
Using Deployment Workbench, you create a share, using the New Deployment
Share Wizard shown in Figure 8. Unlike the distribution share created by Windows SIM, workstations can
actually access image files from the MDT deployment share.

Populate the deployment share.
Deployment Workbench enables you to add operating systems, applications,
device drivers, and other software packages, which you can integrate into your
installations. For a reference computer installation, you typically use the
Install.wim image from a Windows 7 installation disk.
Create a task sequence for the reference computer installation.
The MDT task sequencer is responsible for performing the various steps in a
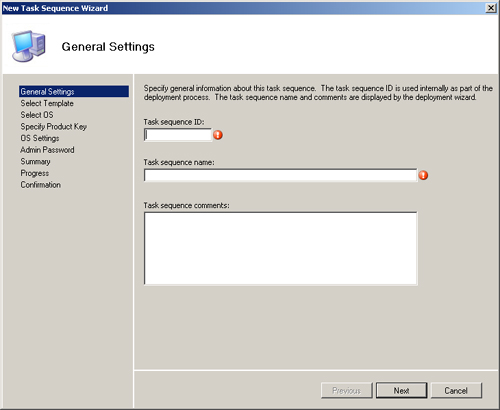
Windows installation. When you create a task sequence in Deployment Workbench
using the New Task Sequence Wizard shown in Figure 9, the wizard
automatically creates an answer file that the Windows setup program uses to
install the operating system. However, task sequences can also perform
additional operations outside of the installation, including automatically
capturing an image of the newly installed workstation.

Update the deployment share.
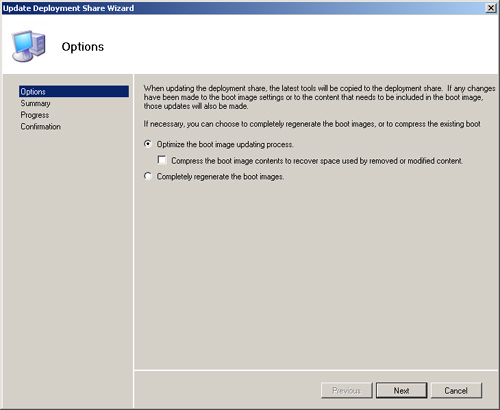
When you update the deployment share in Deployment Workbench, using the
Update Deployment Share Wizard shown in Figure 10, the wizard creates a
boot image using the Windows PE files from the Windows 7 AIK. Unlike the
Copype.cmd script from Windows 7 AIK, however, the wizard creates a customized
boot image that enables the workstation to access the deployment share over the
network.

Deploy the boot image to the reference computer.
MDT 2010 creates a customized boot image, but it cannot deploy this image to
a workstation. However, because the Update Deployment Share Wizard creates the
boot image in both file-based (with a .wim extension) and sector-based (with an
.iso extension) formats, you can deploy the image to the reference computer by
using WDS or by creating a boot disk.
Install the reference computer.
Starting the reference computer by using the boot image automatically
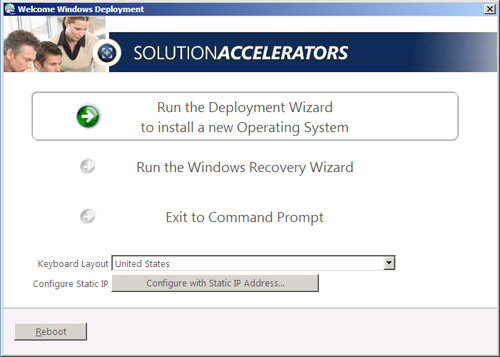
connects the system to the deployment share and launches the Windows Deployment
Wizard, as shown in Figure 11,
from which you can select the task sequence you created earlier.

Capture an image of the reference computer.
You can configure a task sequence to automatically capture an image of the
reference computer after it completes the Windows 7 installation and save it
back to the build computer.
Add the captured image to the deployment share.
After capturing an image of your reference computer, you must add it to the
deployment share, so that you can deploy it to your target workstations.
Create a task sequence for the target computer installation.
In an LTI deployment, the process of deploying your captured image to your
target workstations is roughly the same as the reference computer deployment.
When creating the task sequence for the target computer deployment, you select
your captured reference computer image. You can also configure the task
sequence to perform additional installation and configuration procedures on the
target workstations.
Deploy the reference computer image to the target computers.
After creating the task sequence, you update the deployment share and deploy
the resulting boot image using WDS or boot disks, just as you did earlier, but
this time to the target computers.
A ZTI deployment differs primarily in that it uses System Center Configuration
Manager to deploy the images to the workstations. This complicates the deployment
process considerably, both in the infrastructure required and in the staging of the
reference computer and target computer installations, but it enables administrators
to deploy large numbers of workstations without any interaction at each
workstation.