Installing the Secondary Site Locally from the SMS CD
Follow these steps to install an SMS 2003 secondary site server from the SMS CD:
1. | Begin
Setup from the SMS CD. You’ll see the Systems Management Server Setup
Wizard’s Welcome page, as you did when you were installing the primary
site.
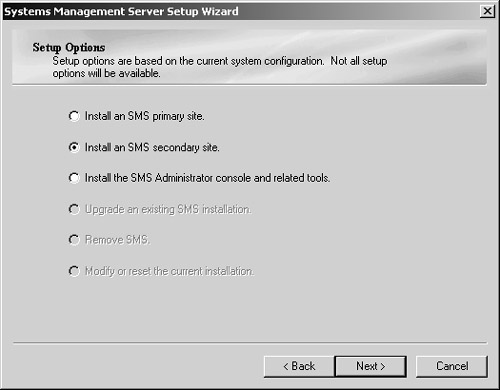
| 2. | Click Next until the Setup Options page is displayed, as shown in Figure 10. Select the Install An SMS Secondary Site option.
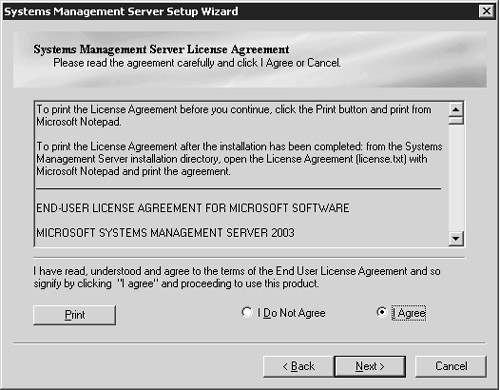
| 3. | Click Next to display the Systems Management Server License Agreement page, as shown in Figure 11. Read the agreement carefully and select the option I Agree.
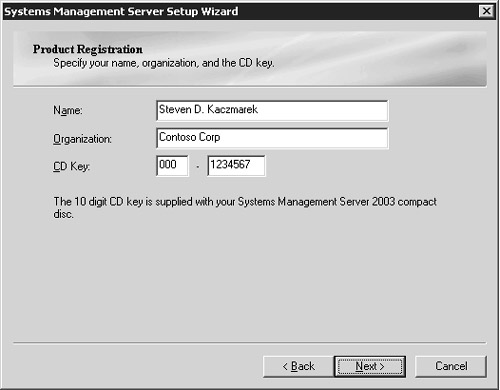
| 4. | Click Next to display the Product Registration page, as shown in Figure 12, and enter the name, organization, and CD Key information.
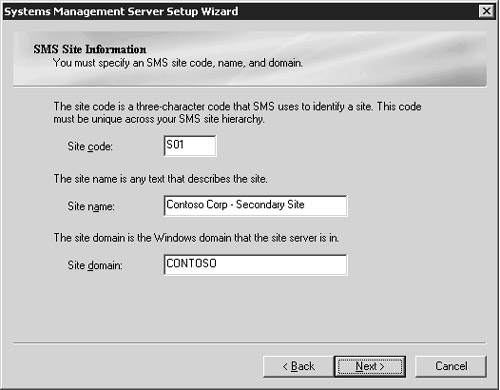
| 5. | Click Next to display the SMS Site Information page, as shown in Figure 13.
Enter the three-character site code you’ll assign to the secondary site
server, a unique descriptive name for the site, and the name of the
Windows domain in which the secondary site server is located.
| 6. | Click Next to display the SMS Security Information page, as shown in Figure 14.
If you intend the site to run in standard security mode, select that
option, enter the name of the SMS Service account that the secondary
site server will use, and confirm the password. If you intend the site
to run in advanced security mode, select that option.
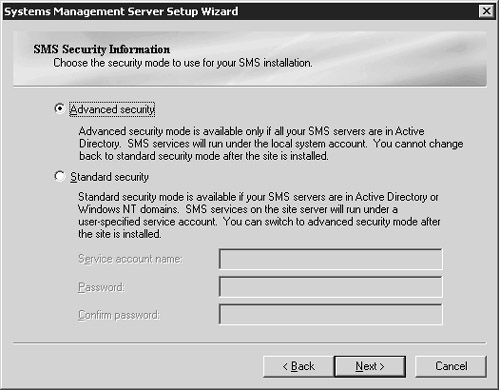
Note You can’t install a secondary site in advanced security mode if the parent site is running standard security. |
Note When
you install a secondary site from its parent site as discussed in the
previous section, the SMS Service account you specify must already have
been created for the target server. However, when installing the site
from the CD, as we are here, it isn’t necessary to have created the
account ahead of time. If the account hasn’t yet been created, the setup
program can do that for you just as it does during the installation of a
primary site . |
| 7. | Click Next to display the Installation Options page, as shown in Figure 15.
Select the SMS 2003 options that you want to enable on the secondary
site server. You can also change the directory in which the components
are installed on your site server.
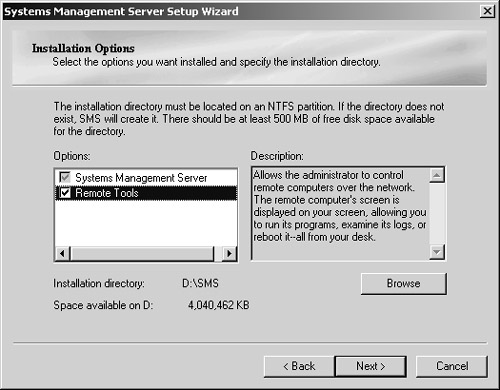
Note When
installing SMS from the CD, you can select which SMS options you want
to install, much like a custom installation for a primary site server.
Notice, however, that only those options that don’t require access to an
SMS site database or that are applicable to the SMS Administrator
Console are listed as valid options. |
| 8. | Click Next to display the Parent Site Information/Identification page, as shown in Figure 16.
Enter the site code and server name of the parent primary site and
select the network connection type that the secondary site will use to
connect to that parent site. Your connection choices include Local Area
Network, the default, Asynchronous RAS link, ISDN RAS link, X.25 RAS
link, and SNA Over RAS link. If your primary and secondary sites are in
the same Active Directory forest, be sure that the This Computer And The
Parent Site Server Are In The Same Active Directory Forest option is
enabled. If your primary and secondary sites are not in the same forest,
clear this option. See Chapter 8, “Designing Your SMS Sites and
Hierarchy,” in the Microsoft Systems Management Server 2003 Concepts, Planning, and Deployment Guide (on the SMS 2003 CD) for more information about parent and child sites that exist in different forests.
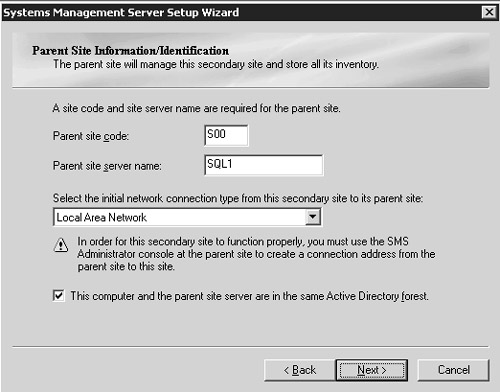
Caution You’ll
still need to create a valid address at the primary site server that
identifies connection parameters that allow the primary site to connect
back to the secondary site server. The steps for creating an address
will be discussed in the section entitled “Creating an Address” later in this chapter. |
| 9. | If
you selected Standard Security in step 6, the Connection Account
Information page will be displayed when you click Next, as shown in Figure 17.
If you selected advanced security in step 6, the site won’t require any
additional connection accounts and you can go on to step 10.
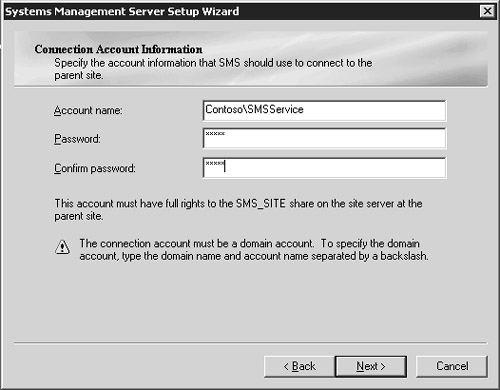
On the Connection Account Information page, you must enter the
name and password of the account that the secondary site server will use
to connect to the parent site. This account will generally be the SMS
Service account, but it can be any account that has at least Change
access to the SMS_Site share on the primary site server.
If you’re running advanced security, the computer account of the
parent site must be a local administrator on the secondary site server,
and the computer account of the secondary site server must be a local
administrator of the parent site.
| 10. | Click
Next to display the Completing The Systems Management Server Setup
Wizard page, review your selections, and then click Finish to begin the
installation process. Again, you can click the Back button from this
page or any previous page to go back and modify your entries. As with
the primary site installation, if the service account hasn’t been
created ahead of time, Setup can create an account for you. Setup will
display a dialog box prompting you to do so; choose Yes.
Note When
you apply a service pack to your SMS sites, secondary sites aren’t
automatically upgraded when the parent site is upgraded. To upgrade your
secondary site server, first upgrade its parent primary site. When you
right-click the secondary site object in the SMS Administrator Console
for the primary site, you’ll have an option to upgrade the site. When
you select this option, an upgrade wizard will walk you through the
upgrade process. |
|
|
