Creating a Node and Disk Majority Cluster
When the failover cluster is
first created, all nodes in the cluster should be up and running. To
create the failover cluster, perform the following steps:
1. | Log
on to one of the Windows Server 2008 R2 cluster nodes with an account
with administrator privileges over all nodes in the cluster.
|
2. | Click Start, click All Programs, click Administrative Tools, and select Failover Cluster Management.
|
3. | When the Failover Cluster Management console opens, click the Create a Cluster link in the Actions pane.
|
4. | When the Create Cluster Wizard opens, click Next on the Before You Begin page.
|
5. | On
the Select Servers page, enter the name of each cluster node, and click
the Add button. When all the nodes are listed, click Next to continue.
|
6. | On
the Validation Warning page, select No. I Do Not Require.... The
validation test can be run after the configuration is complete. Click
Next to continue.
|
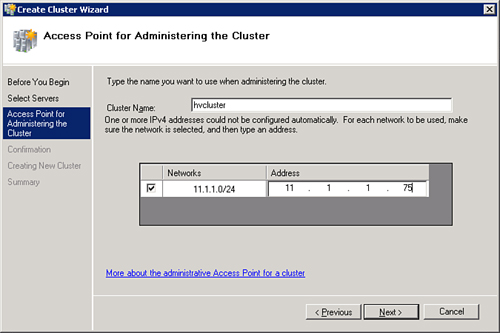
7. | On
the Access Point for Administering the Cluster page, type in the name
of the cluster, complete the IPv4 address, and click Next, as shown in Figure 2. The name you choose for the cluster will become a cluster computer account in Active Directory.
|
8. | On the Confirmation page, review the settings, and click Next to create the cluster.
|
9. | On
the Summary page, review the results of the cluster creation process,
and click Finish to return to the Failover Cluster Management console.
If there are any errors, you can click the View Report button to reveal
the detailed cluster creation report.
|
10. | Back
in the Failover Cluster Management console, select the cluster name in
the tree pane. In the tasks pane, review the configuration of the
cluster.
|
11. | In the tree pane, select and expand Nodes to list all the cluster nodes.
|
12. | Select
Storage and review the cluster storage in the tasks pane. The shared
storage disk will be listed as the witness disk in quorum. This disk is
used to maintain quorum.
|
13. | Expand
Networks in the tree pane to review the list of networks. Select each
network and review the names of the adapters in each network.
|
14. | Click
Validate Configuration in the Actions pane to start an automated review
of the cluster configuration. See the previous section, “Running the Validate a Configuration Wizard,”
for more details. Keep in mind that Microsoft support for the cluster
will require a successful execution of the validation process.
|
Adding Additional Shared Storage
At this point, we have a Node
and Disk Majority cluster using a shared witness disk to maintain
quorum. We can now add the shared storage that will be used as a Cluster
Shared Volume.
Another LUN must be
provisioned for the Cluster Shared Volume to hold the virtual machine
images used in Live Migration. This LUN may be a new unpartitioned
volume or one that already contains virtual machine images and data.
Connect
this LUN via iSCSI or Fibre Channel to both nodes in the cluster. The
disk must be initialized and formatted with an NTFS file format prior to
cluster use in the cluster. When properly configured, the disk will
show in Disk Management on both nodes.
Next, we add the new shared disk to the cluster.
1. | On one of the cluster nodes, open Failover Cluster Management.
|
2. | Expand the Cluster and select Storage.
|
3. | Click Add a Disk in the Actions pane.
|
4. | Select the disk to add and click OK. The disk will be added to available storage.
|
Configuring Cluster Shared Volumes
Cluster Shared Volumes (CSVs) are
a new concept for Windows Server 2008 R2. They provide the new
capabilities required for Hyper-V Live Migration to work, and is why
only Windows Server 2008 R2 nodes can participate in the cluster.
With CSV, any node can host the
virtual machine and any node can access the VHD on shared storage, so
virtual machine and disk ownership can move freely across cluster nodes
without impacting any other resources on that shared disk.
To enable and configure Cluster Shared Volumes, perform the following steps from the Failover Cluster Management console:
1. | Select the cluster name in the Failover Cluster Management console.
|
2. | Click Enable Cluster Shared Volumes in the Actions pane.
|
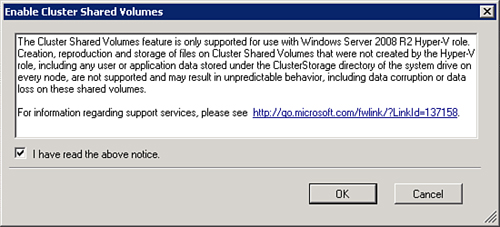
3. | The Enable Cluster Shared Volumes information dialog box will be displayed. Read the important information, shown in Figure 3,
explaining that CSVs are only supported for the Hyper-V role on Windows
Server 2008 R2 servers. Click the check box that you have read the
notice and click OK.
|
4. | A new item, Cluster Shared Volumes, will be added to the tree view. Select Cluster Shared Volumes.
|
5. | Click Add Storage in the Actions pane. The Add Storage window is displayed.
|
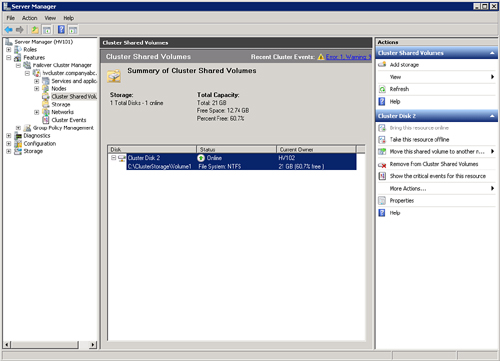
6. | Click
the check box to select the shared cluster disk and click OK. The
shared disk will be added to Cluster Shared Storage, as shown in Figure 4.
|
Unlike other shared
volume disks, Cluster Shared Volumes are presented to the nodes as a
folder in the local C: drive of each node.
From either node, open Windows
Explorer and navigate to the path indicated in the Cluster Shared Volume
disk, usually C:\ClusterStorage\Volume1, where each CSV is given a
unique number beginning with 1. If another CSV disk is added to the same
cluster, it will be accessible from C:\ClusterStorage\Volume2.
