3. Mail-Enable Public Folder
Mail-enabling public folders
allows people to post content to public folders by sending an email
message to a configured address. This allows users that are external to
the Exchange organization to post to the public folder. To mail-enable a
public folder using the EMC, perform the following general steps:
In the EMC, open the Public Folder Management Console from the Toolbox node.
Select
the parent of the public folder that you wish to mail-enable and then
select the folder that you wish to mail-enable in the details pane.
Click on Mail Enable on the Actions pane.
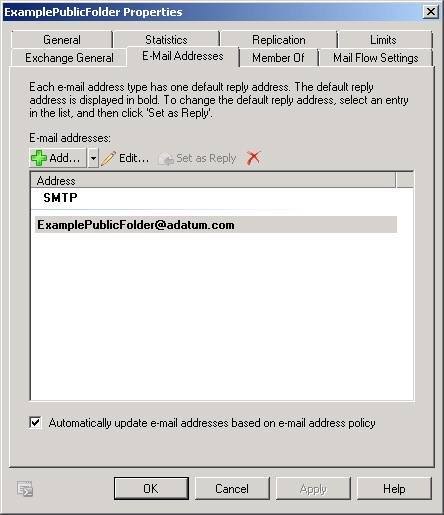
Right-click
on the public folder in the Details pane and then click Properties.
Verify that the E-Mail Addresses tab and the Mail Flow Settings tab are
present, as shown in Figure 3. This indicates that the public folder is mail-enabled.
You use the Enable-MailPublicFolder
cmdlet to mail-enable a public folder from the EMS. For example, to
mail-enable the Sales public folder, issue the following command:
Enable-MailPublicFolder -Identity "\Sales"
Note:
MAIL-ENABLE PUBLIC FOLDER
To learn more about mail-enabling a public folder, consult the following article on TechNet: http://technet.microsoft.com/en-us/library/aa997560.aspx.
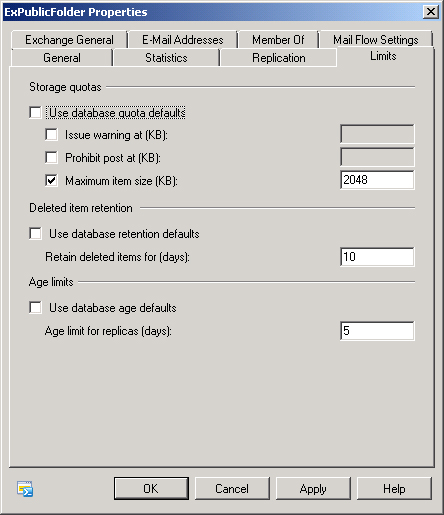
4. Configuring Public Folder Limits
Public folder limits allow you
to configure limits on items posted to public folders, such as maximum
size and age. You configure maximum item size, deleted item retention,
and item age limits on the Limits tab of a public folder’s properties,
as shown in Figure 4.
You configure message size limits using the Set-PublicFolder
cmdlet with the MaxItemSize parameter. For example, to set a 1 MB limit
on the public folder \ExemplarFolder, issue the following command:
Set-PublicFolder -Identity '\ExemplarFolder' -MaxItemSize 1MB -UseDatabaseQuotaDefaults
$false
You can configure the
maximum receive size for a mail-enabled public folder through the EMC by
editing the Receiving Message Size setting in Message Size Restrictions
on the Mail Flow tab. This setting controls messages that are posted to
the folder through email but does not restrict posting through other
methods. You can configure the maximum receive size for a mail-enabled
public folder using the Set-MailPublicFolder
cmdlet with the MaxRecieveSize parameter in the EMS. For example, to
configure the ExemplarFolder public folder with a maximum receive size
of 1 MB for items sent to the folder through email, issue the following
command:
Set-MailPublicFolder -Identity '\ExemplarFolder' -MaxReceiveSize 1MB
To configure age limits from the EMS, use the Set-PublicFolder
cmdlet with the AgeLimit parameter and the UseDatabaseAgeDefaults
$false option. For example, to set the age limit for the ExemplarFolder
public folder to 21 days, issue the following command:
Set-PublicFolder -Identity 'ExemplarFolder' -AgeLimit 21 -UseDatabaseAgeDefaults $false
Note:
SET-PUBLICFOLDER
To learn more about configuring public folder limitations using the Set-PublicFolder cmdlet, consult the following article on TechNet: http://technet.microsoft.com/en-us/library/aa998596.aspx.
Note:
Remember which public folder options can be configured using the Set-PublicFolder cmdlet and which ones can be set using the Set-MailPublicFolder cmdlet.
