Logo
programming4us
programming4us
programming4us
programming4us
Home
programming4us
XP
programming4us
Windows Vista
programming4us
Windows 7
programming4us
Windows Azure
programming4us
Windows Server
programming4us
Windows Phone
 
Windows Server

Migrating to Windows Small Business Server 2011 Standard : Migrating Settings and Data (part 2) - Configure the Network

- Free product key for windows 10
- Free Product Key for Microsoft office 365
- Malwarebytes Premium 3.7.1 Serial Keys (LifeTime) 2019
8/27/2011 3:25:49 PM
2.1.2. Configure the Network

To configure the network, follow these steps:

  1. Click Next to move to the Set Up The Network page shown in Figure 6.

  2. Click Start The Connect To The Internet Wizard link to open the Before You Begin page of the Connect To The Internet Wizard. Read it carefully to know what you’ll need before you start.
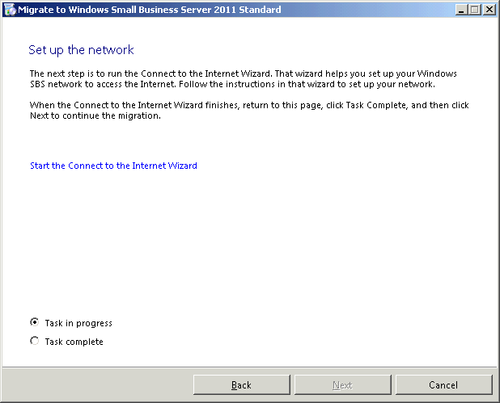
    Figure 6. The Set Up The Network page of the Migrate To Windows Small Business Server 2011 Standard Wizard

  3. Click Next and the wizard will start detecting your current network and locating your router. When it completes, you’ll see the page shown in Figure 7.
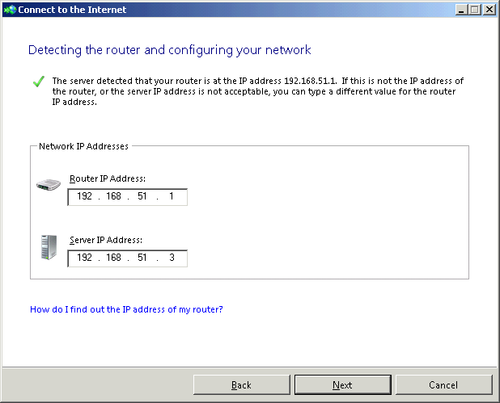
    Figure 7. The Connect To The Internet Wizard has correctly detected the router and server IP addresses

  4. Click Next. If you have a UPnP router, the wizard will automatically configure it. If you don’t, you’ll see a page describing how to manually configure the settings required.

  5. Click Finish, and then select Task Complete and click Next to return to the Migration Wizard Home page. The Configure The Network task now shows as Completed.

2.1.3. Configure the Internet Address

To configure the Internet address, follow these steps:

  1. Click Next to open the Configure The Internet Address page. Read the warning about certificate distribution to remote users. If you are using self-signed certificates and you don’t follow the advice shown now, your users will be locked out of Remote Web Access (RWA) and Outlook Web Access (OWA) until you distribute new certificates to them.

  2. Click Start The Internet Address Management Wizard when you’re ready to move your RWA and OWA sites to the new SBS 2011 server.

  3. Click Next on the Before You Begin page (after reading it) to open the Do You Want To Register A New Domain Name page, shown in Figure 8.
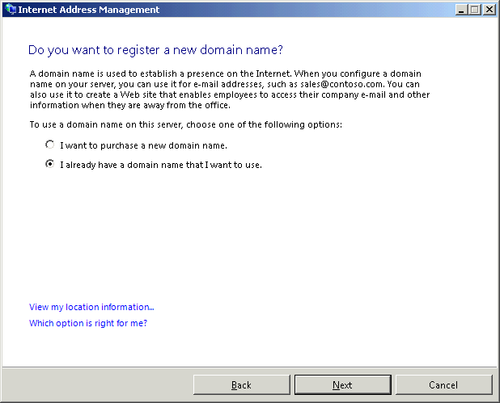
    Figure 8. The Do You Want To Register A New Domain Name page of the Internet Address Management Wizard

  4. Select the appropriate choice for your network. If you’re not changing your Internet domain name, choose I Already Have A Domain Name That I Want To Use.

  5. Click Next to open the How Do You Want To Manage Your Domain Name page, shown in Figure 9. If you’re already managing your domain name, there’s no reason to change.
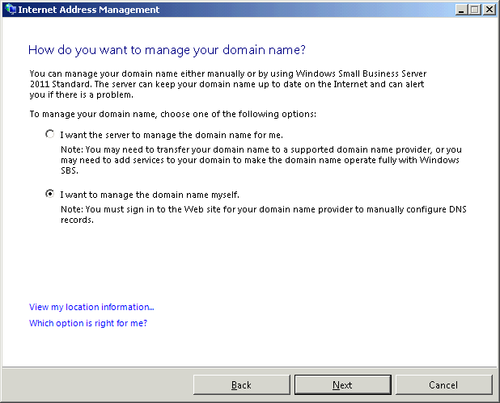
    Figure 9. SBS 2011 can automatically manage DNS records and your domain name

  6. Click Next to open the Store Your Domain Name Information page of the wizard, as shown in Figure 10.
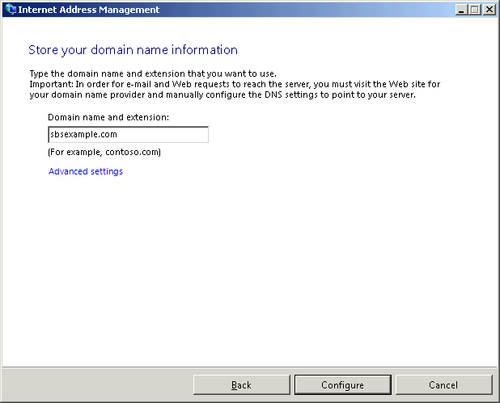
    Figure 10. The Store Your Domain Name Information page of the Internet Address Management Wizard

  7. Type your Internet domain name in the Domain Name And Extension field and then click Configure. This will configure your RWA site, your Exchange email address, and your Internet router if it supports UPnP. If it doesn’t, you need to manually configure the settings on the router.

    If you need to use a remote access prefix other than remote.yourdomainname.com for your RWA site, you can click the Advanced Settings link to open the Advanced Settings dialog box shown in Figure 11. But really, stick with the defaults unless there is a compelling reason not to.
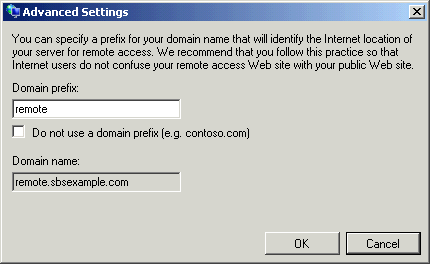
    Figure 11. You can change the default domain prefix if necessary

  8. Click Configure to run the Internet Address Management Wizard, as shown in Figure 12.
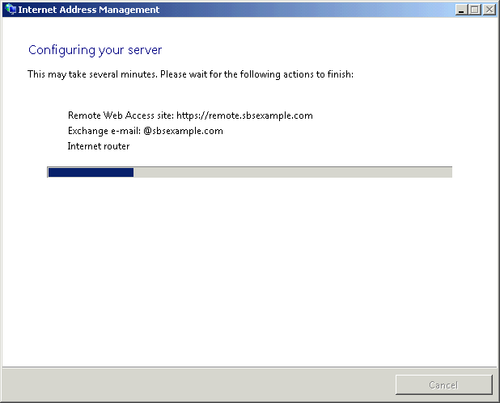
    Figure 12. The Configuring Your Server page of the Internet Address Management Wizard

  9. If your router doesn’t use UPnP (and we certainly don’t run it on ours or recommend that others do), you’ll see a warning on the Congratulations! page, as shown in Figure 13.
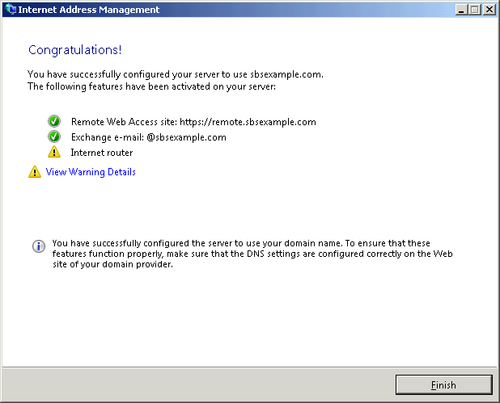
    Figure 13. If your router doesn’t have UPnP enabled, you’ll see a warning symbol next to Internet Router

  10. Click on the View Warning Details link to open the Internet Address Management Warning Details dialog box shown in Figure 14. You can safely ignore this warning now, but write down the ports listed. You’ll want to go manually configure your router or firewall to forward those ports to your new SBS 2011 server.
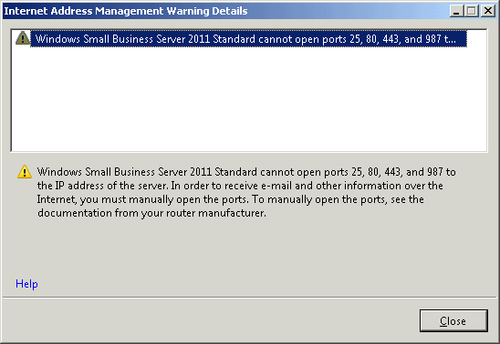
    Figure 14. The Internet Address Management Warning Details dialog box

  11. Click Close and then click Finish to return to the Configure The Internet Address page of the Migration Wizard. Select Task Complete and then click Next to return to the Migration Wizard Home page.

Other -----------------
- Migrating to Windows Small Business Server 2011 Standard : Creating a Migration Answer File
- Microsoft Dynamics CRM 2011 : Copying Campaign Records & Using Quick Campaigns
- Microsoft Dynamics CRM 2011 : Managing Campaigns and Quick Campaigns - Relating Campaigns & Creating Campaign Templates
- Securing Windows Server 2008 R2 : Security Configuration Wizard & Best Practice Analyzer
- Securing Windows Server 2008 R2 : BitLocker
- Microsoft Dynamics AX 2009 : The MorphX Tools - Cross-Reference Tool
- Microsoft Dynamics AX 2009 : The MorphX Tools - Compare Tool
- Configuring Windows Server 2008 Active Directory : Configuring and Using Active Directory Federation Services
- Configuring Windows Server 2008 Active Directory : Understanding Active Directory Federation Services
- SQL Server 2008 R2 : Understanding Query Optimization - Query Analysis
 
 
Top 10
- Microsoft Visio 2013 : Adding Structure to Your Diagrams - Finding containers and lists in Visio (part 2) - Wireframes,Legends
- Microsoft Visio 2013 : Adding Structure to Your Diagrams - Finding containers and lists in Visio (part 1) - Swimlanes
- Microsoft Visio 2013 : Adding Structure to Your Diagrams - Formatting and sizing lists
- Microsoft Visio 2013 : Adding Structure to Your Diagrams - Adding shapes to lists
- Microsoft Visio 2013 : Adding Structure to Your Diagrams - Sizing containers
- Microsoft Access 2010 : Control Properties and Why to Use Them (part 3) - The Other Properties of a Control
- Microsoft Access 2010 : Control Properties and Why to Use Them (part 2) - The Data Properties of a Control
- Microsoft Access 2010 : Control Properties and Why to Use Them (part 1) - The Format Properties of a Control
- Microsoft Access 2010 : Form Properties and Why Should You Use Them - Working with the Properties Window
- Microsoft Visio 2013 : Using the Organization Chart Wizard with new data
 
programming4us
Windows Vista
programming4us
Windows 7
programming4us
Windows Azure
programming4us
Windows Server