2.1.4. Migrate Network Settings
To migrate network settings, follow these steps:
Click Next to open the Migrate Network Settings page of the Migration Wizard, shown in Figure 15.
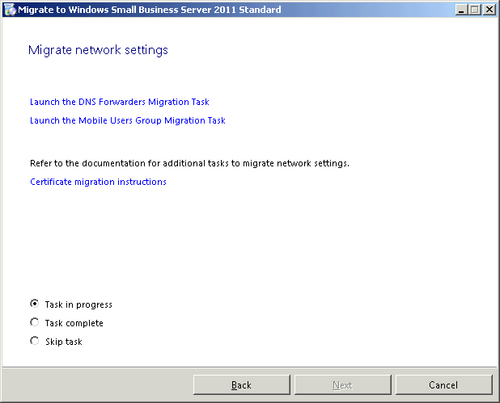
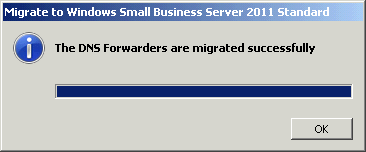
Click Launch The DNS Forwarders Migration Task. When the task completes, you’ll see the informational message shown in Figure 16.
Click OK to return to the Migrate Network Settings page. Click Launch The Mobile Users Group Migration Task to migrate the Mobile Users group. The Mobile Users group is not a default SBS 2011 Security Group. Click OK when the wizard completes to return to the Migrate Network Settings page. Click
the Certificate Migration Instructions link for details on how to
migrate certificates. Migration of Self-Issued certificates is not
supported, but Trusted Third-Party certificates can be migrated to the
new SBS 2011 server. Select Task Complete and then click Next to return to the Migration Wizard Home page.
2.1.5. Migrate Exchange Mailboxes and Settings
To migrate Exchange mailboxes and settings, follow these steps:
Click Next to open the Migrate Exchange Mailboxes And Settings page of the Migration Wizard. Click the Migrate Exchange Server Mailboxes And Public Folders link to open the TechNet article on migrating Microsoft Exchange. This is a critical step if you’re running Microsoft Exchange on your existing SBS server. The steps you’ll be performing will Remove the Internet Connectors from the source server. Move any POP3 connectors from the source server if you’re currently using POP3. Move your Public Folders from the source server to the destination server. Move the Offline Address book from the source server to the destination server. Move the users’ mailboxes from the source server to the destination server.
Carefully read each step of the process. Do not try to skip any steps, but follow them rigorously. Click
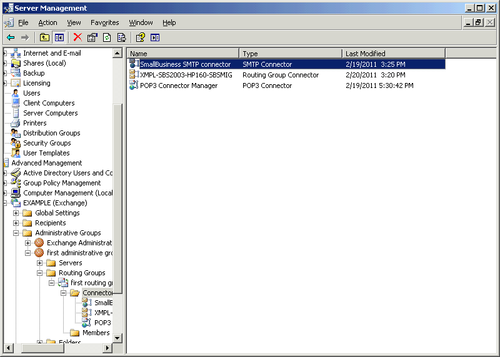
the Remove Internet Connectors link, and follow the instructions
exactly to remove the SmallBusiness SMTP Connector from the SBS 2003
source server, as shown in Figure 17.
Follow the instructions for moving POP3 connectors if you’re using them. This is an optional step. Follow
the instructions for moving Public Folders carefully. This is a
critical step and can take a substantial amount of time on a large
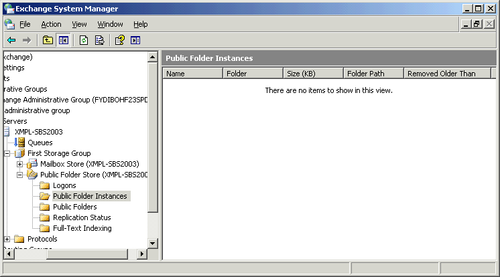
Public Folder store. Do not proceed until the Public Folder Instances
folder is empty, as shown in Figure 18.
Warning:
IMPORTANT
It takes awhile for the Public Folder Instances container to completely
empty, and for a while it seems as if nothing is happening at all. Be
patient.
Follow
the instructions for moving your offline address book (OAB). Unlike the
previous steps, this is done on the destination server, as shown in Figure 19.
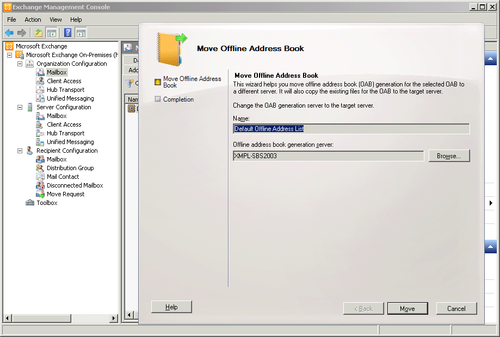
When the Move Offline Address Book Wizard completes successfully, select the Offline Address Book in the Exchange
Management Console. Click Properties from the Action menu to open the
Default Offline Address List Properties dialog box. Click on the Distribution tab, and then select the Enable Web-Based Distribution check box, as shown in Figure 20.
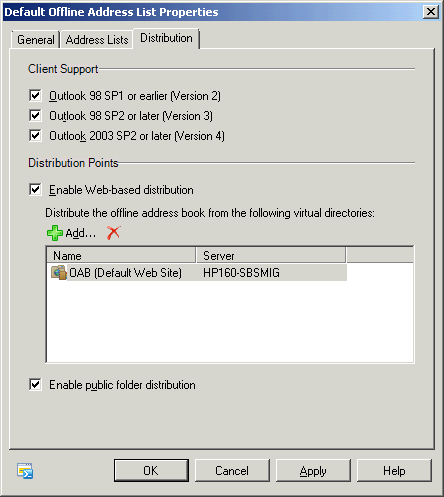
Click
Add, and select OAB (Default Web Site) for the destination server.
Click OK, and then click OK again to close the Default Offline Address
List Properties dialog box. Continue
to follow the instructions to set the offline address book for the
Mailbox database. When this task is complete, you can begin to move the
users’ mailboxes. On
the destination server, follow the instructions to move the mailboxes.
In the Exchange Management Console, navigate to the Recipient
Configuration container. Select Mailbox in the left pane, and then select all the mailboxes in the center pane, as shown in Figure 21.
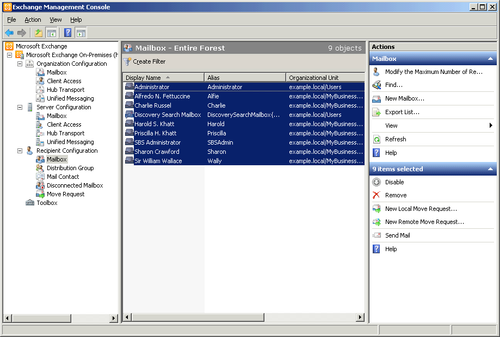
Click New Local Move Request in the right pane to open the New Local Move Request Wizard shown in Figure 22.
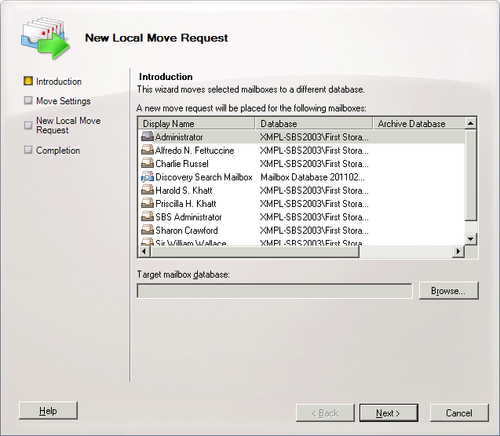
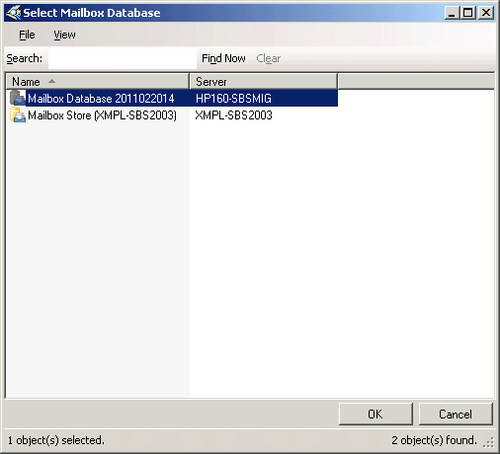
Click Browse to open the Select Mailbox Database dialog box, shown in Figure 23. Select the destination SBS 2011 server and then click OK to return to the New Local Move Request Wizard.
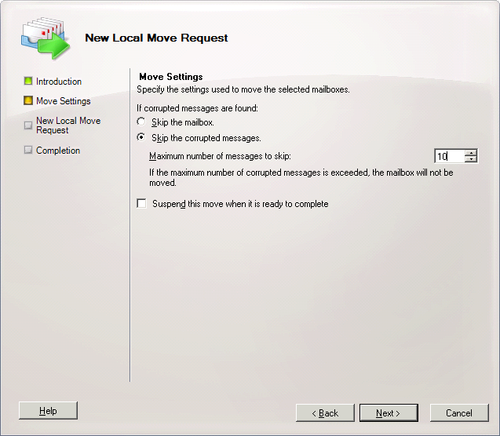
Click Next to open the Move Settings page, shown in Figure 24.
Set a reasonable number of messages to skip if there is corruption of a
mailbox. You might have to do additional cleanup on a problem mailbox
to successfully move all the mailboxes.
Click
Next, then click New, and then click Finish to close the New Local Move
Request Wizard. Any mailboxes that can’t be moved will need to be
deleted, so be prepared to manually clean up any problem mailboxes. When
all the moves have completed, click on Move Request in the Recipient
Configuration container and highlight the completed Move Requests item.
Click Clear Move Request. Acknowledge the warning and then close the
Exchange Management Console, and return to the Migrate Exchange Mailboxes And Settings page. Select Task Complete, and click Next to return to the Migration Wizard Home page.
|