2.1.11. Finish the Migration
When you finish migrating users
and groups, the next step is to finish the migration and decommission
the source server. When you click Next on the Migration Wizard Home
page, you get one last chance to complete any steps you marked as
skipped, as shown in Figure 31.
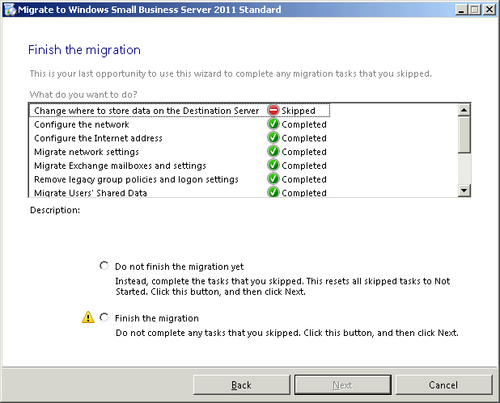
If there are any optional
tasks that you delayed because you weren’t ready to complete them, now
is the time to complete them. Select Do Not Finish The Migration Yet,
and then click Next to reset the Skipped flag and mark them Not Started,
as shown in Figure 32.
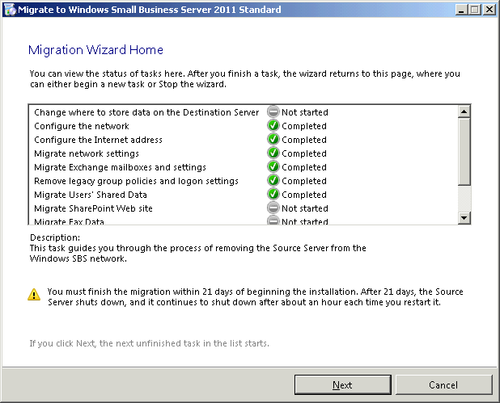
Click Next to begin doing the
optional tasks you skipped previously. When you get to the end of the
tasks list again, click Next and then select Finish The Migration if you
have any skipped tasks that you don’t want to do.
Finally, click Next to open
the Finish The Migration page. On this page, you are told to demote the
old SBS 2003 server to no longer be a domain controller. To demote the
SBS 2003 server, follow these steps:
Log on to the SBS 2003 server with an administrative account.
Open a command window. At the prompt, type ncpa.cpl and press Enter to open the Network Connections application as shown in Figure 33.
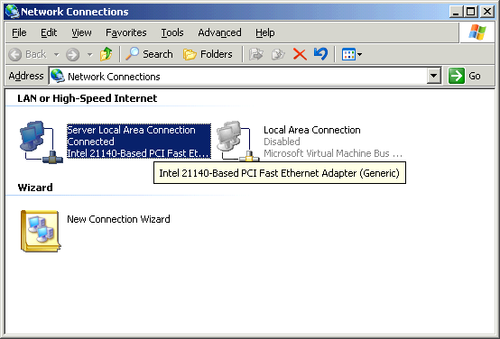
Right-click the remaining active network connection and select Properties.
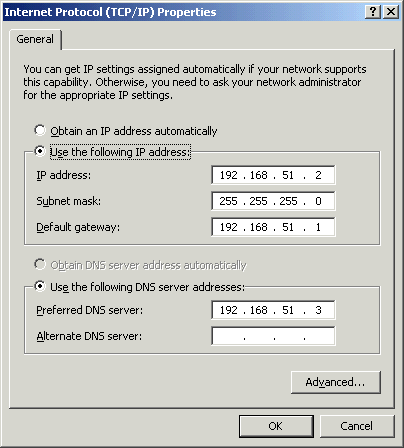
Select Internet Protocol (TCP/IP), and click Properties to open the Internet Protocol (TCP/IP) Properties dialog box shown in Figure 34.

Change the Preferred DNS Server address to the IP address of the destination server, as shown in Figure 35. Click OK to close the TCP/IP Properties dialog and then click OK again.
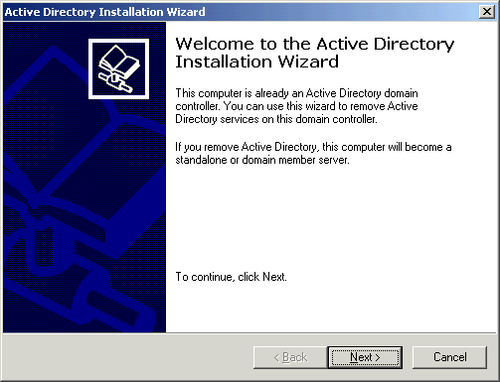
Open a command window. At the prompt, type dcpromo and press Enter to open the Active Directory Installation Wizard, as shown in Figure 36.
Click Next and the Global Catalog server warning shown in Figure 37 will be displayed.

Click OK to open the Remove Active Directory page shown in Figure 38.
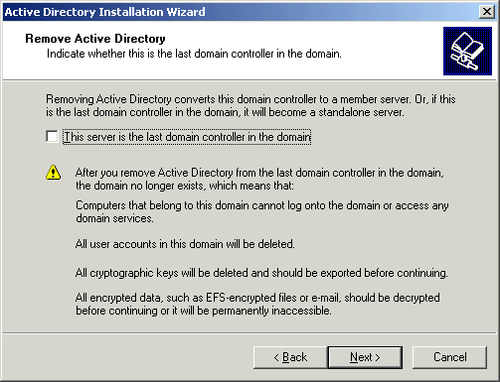
Leave the check box cleared, and click Next to open the Administrator Password page.
Type in a password, type it in again to confirm it, and then click Next to open the Summary page shown in Figure 39.
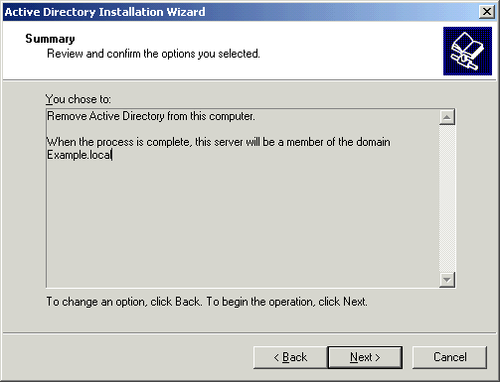
Click Next and the wizard will remove Active Directory and demote the original SBS 2003 server to a domain member.
When the wizard completes successfully, click Finish and then click Restart Now.
On
the Finish The Migration page of the Migration Wizard, select The
Source Server Is No Longer A Domain Controller and click Next.
Disconnect
the original SBS 2003 server from the network, and do not reconnect it
until you have completely reformatted it and installed a new operating
system.
On the SBS 2011 server, open the Windows SBS Console if it isn’t open.
Click Network in the navigation bar and then click on the Computers tab, as shown in Figure 40.
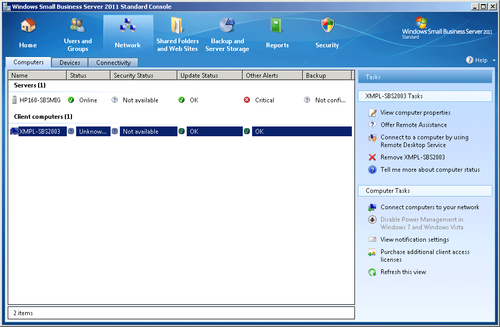
Select the former SBS 2003 computer in the Client Computers section and click Remove in the Tasks pane.
Click Yes at the prompt and the SBS 2003 computer is removed from the domain.
2.2. Re-Enabling Folder Redirection
When the migration tasks are complete, you can re-enable Folder Redirection for user accounts. SBS 2011
allows you to do folder redirection by individual user account instead
of requiring you to do it as an all-or-none proposition.
To enable folder redirection, follow these steps:
Open the Windows SBS Console if it isn’t open.
Select Users And Groups in the navigation bar and then click Users.
Click Redirect Folders For User Accounts To The Server in the Tasks pane to open the Folder Redirection Properties dialog box shown in Figure 41.
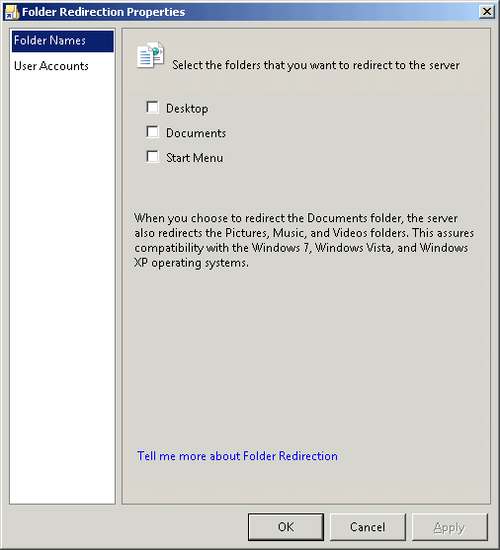
Select
the folders that you want to redirect and then click User Accounts in
the left pane to open the User Accounts page shown in Figure 42.
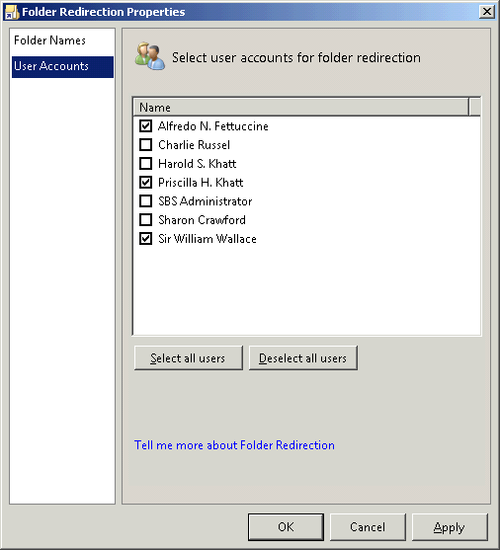
Select the accounts you want to use folder redirection on and then click OK to redirect the accounts.
Click Close at the success message to return to the Windows SBS Console.
